New Year is already knocking! We are preparing a gingerbread house and sleigh! Recipe: Gingerbread sleigh - gingerbread with icing Option using metal stencils
You can make such a not at all complicated house on New Year’s Eve,
and he will delight both you and your children for several weeks,
creating a festive mood.
To build our house we need to cut out templates. The front wall is 15cm wide and 17cm high. 
From each such template we need to cut out two parts from the dough - these will be two of the four sides of our house. 
And one more template for the two remaining sides of our house.
The template is 17cm long and 7cm wide.
The roof template is 22 cm long and 14.5 cm wide.
On a sheet of parchment, roll out the dough into a layer 5-6 mm thick. If you roll it thinner, the gingerbread will be too dry.
We attach ready-made templates and cut along the contour.
We remove the trimmings and transfer the cut out parts along with the parchment onto a baking sheet. 
Bake on the middle shelf of the oven at 180oC for 20 minutes.
After baking, while the dough is still hot, we cut out the details of the doors and windows using the same templates cut out of paper. 
Cut while the pastry is hot. Cut the cut out window in half lengthwise. These are future shutters. Cool all parts on a wire rack. 
Now we cut out the windows in the side walls of the house. 
From the remaining dough we cut out the roof of the house, Christmas trees, a pipe, small stands for the Christmas trees, and any interesting details and figures. 
This is what the windows look like from the inside. We attach the marmalade to the cut out windows using a glaze of powdered sugar and egg white. 
This is what these windows look like from the outside. A little more and we will decorate them with icing snow and shutters. 
We attach the walls of the house to each other using the same glaze.

To ensure that the walls hold well while the glaze dries, we will support them for convenience with glass jars or boxes.
Now we remove the supports. The glaze has dried and you can attach the roof and decorate the windows. 
We attach the roof of the house to the walls. 
We place the support for 10-15 minutes so that the glaze dries a little. We fasten the second half of the roof and leave it to dry. 
We attach the shutters, draw a window and decorate with snow icing 
We draw tiles, decorate the windows and roof with snow and icicles. 
Using melted chocolate and a brush, paint “wooden” beams on the house. 
We paint with chocolate on shutters and doors. 
We fasten the pipe. 

We plant Christmas trees near the house, securing them on gingerbread stands. 
We attach the Christmas trees to the stand with icing. 
Above the entrance we will draw a Christmas wreath from a cornet. 
Decorate it with red dots of “berries”. 
Sprinkle generously with powdered sugar. First, chaotically, and then sift it through a fine sieve so that the snowball seems fluffy and fresh. 
Let's enliven our house with a figurine of a snowman and the light of a garland or flashlight inside the house.
Warm, cozy and tasty.
You can celebrate Christmas! 
And now the recipe!
PREPARATION OF THE DOUGH.
For the test:
4 cups flour
salt
1 packet of baking powder
200 g butter
200 g powdered sugar
5 tablespoons of liquid honey (if the honey is candied, heat it in a water bath)
4 egg yolks
Spices 1 tsp:
ground ginger,
cinnamon (this is to taste, because not everyone likes cinnamon),
zest of 1 lemon,
cardamom,
anise.
Knead the dough, wrap in film and put in the refrigerator for several hours.
This dough is very tasty, fragrant, but you need to work with it carefully so as not to tear.
and another recipe
– 100 g butter
– 200 g black molasses
– 175 g honey
– 500 g white flour
– 100 g ground almonds
– 15 g ground ginger
– 5 g spicy mixture
– 5 g ground cinnamon
– 2.5 g ground nutmeg
– 10 g baking soda
– 100 g chopped ginger
– 100 g chopped zest of various citrus fruits
To make the house shown in the photo and according to the templates given, triple all specified quantities of products.
For the glaze:
– 500 g powdered sugar
– whites of 2 eggs
– 5 ml lemon juice
Equipment:
– Rolling pin
– 2 baking trays
– Pastry bag with tips
– Board for assembling the house
And one more house

The roof of the house is covered with tiles made of cookies, the chimney is lined with halves of peanuts, the shutters are made of waffles, and the porch with columns is made of candy canes.
Next to the house there are trees made of waffle ice cream cups and pebbles made of gingerbread cookies.
WE WILL NEED
White dough (for roof, chimney)
Ginger dough (for walls)
Glaze (snow, smoke from a chimney, fastening parts, finishing windows, doors)
Cookies "Waffles" (shutters)
Crumbs or sprinkles covered with fragrant glaze in the form of krakratik (decoration above the windows)
Multi-colored crumbs - balls (artistic decoration of festive illumination and trees)
Square cookies (canopy over the porch) - 2 pcs.
Peanut halves (chimney)
Cushion cookies (roof tiles)
Waffle cones for ice cream (Christmas trees)
Lollipops such as “holse” or “bon paris” (columns near the porch, mailbox)
Small Ginger Round Cookies (Stone Path)
CUT OUT PARTS 
1. One square = 1 cm.
2. Redraw the pattern in full size in centimeters (it’s more convenient on checkered paper).
3. All parts are made in 2 pieces, the pipe - 3 pieces.
4. Parts “1” belong to the first large house, parts “2” belong to the second small house.
5. The walls are baked from ginger dough.
6. The roof is baked from white dough.
7. One end of the large house is baked half from white, half from ginger dough (see “White dough”, paragraph 13.).
The second end of the large house is baked from ginger dough.
The ends of the small house are baked only from ginger dough.
8. The chimney is baked from white dough.
WHITE DOUGH
For this recipe, knead the dough once.
180-200 g butter
2 cups sugar
1/4 teaspoon baking soda, quenched with vinegar
1 egg
3 cups wheat flour
1. In a large bowl, beat butter with an electric mixer for 30 seconds or until fluffy.
2. Add baking soda and sugar, whisk until completely combined.
3. Add the egg and beat until completely combined.
4. Add flour and quickly knead the dough.
5. Cover the dough and refrigerate for approximately 2 hours.
6. After cooling, divide the dough in half (it’s easier to roll out) and roll it out with a rolling pin into a layer 5-6 mm thick. To prevent the dough from sticking to the table (board), be sure to sprinkle the table with flour.
7. Place the paper pattern of the corresponding part of the house on the rolled out layer and cut out the part from the dough along the contours. 
8. Carefully transfer the part to a baking sheet (you can cover the baking sheet with foil). Place the paper pattern on the piece again and, if the edges of the piece were deformed during transfer, correct them.
9. Bake at t° 150 - 170°C for 5-7 minutes. When the part is slightly browned, it is ready.
10. Quickly remove the piece from the oven, transfer it to the board and, placing the pattern on it, align the edges (since the dough contains soda, the dough moves a little during baking).
11. Cool the part.
12. Do the same with all the parts that are baked from white dough. From the remaining dough you need to form and bake small cookies - “pebbles”, from which you will then make a “stone fence” near the house.
13. SPECIAL DETAIL - END OF A BIG HOUSE
(white roof and ginger end wall are baked together):
13.1. Make a paper pattern for the end of a large house in two copies.
13.2. Cut one copy of the pattern along the dotted line of the roof and cut out this part - the roof - from white dough (do not bake yet!).
13.3. Cut out the lower part of the part - the wall of the end of the house - from ginger dough (on the paper pattern the part ends with a solid line located just above the dotted line, parallel to it).
13.4. Place the ginger pastry on the white roof along the border as on the paper pattern. Lubricate the application area with a little water for gluing and press gently.
13.5. Cut strips from the ginger dough (according to the size of the pattern) and glue them onto the white dough roof using water.
13.6. Carefully transfer the part to a baking sheet (can be covered with foil). Place a whole paper pattern on the part and correct the edges that were deformed when the part was transferred.
13.7. Bake at t° 150-170°C, 5-7 minutes. When the part is slightly browned, it is ready.
13.8. Quickly remove the piece from the oven, transfer it to the board and, placing the whole pattern on it, align the edges.
13.9. Cool the part.
GINGER DOUGH
For this recipe, knead the dough twice, each knead separately.
80-100 g butter
one and a half cups of sugar
one and a half teaspoons of ginger
one and a half teaspoons of cloves
1 teaspoon baking soda, quenched with vinegar
1/2 teaspoon salt
1 egg
2 cups honey
2 tablespoons lemon juice
2 cups wheat flour
1 cup bran or 3 cups wheat flour
1. In a large bowl, beat butter with an electric mixer for 30 seconds until fluffy. Add sugar, ginger, cloves, baking soda and salt, whisk until completely combined.
2. Add the egg, molasses and lemon juice and beat until thoroughly combined.
3. Add flour and knead the dough.
4. Wrap the dough in plastic and keep in a cool place for 3 hours.
Our Christmas trees will be waffle ice cream cones. If there are no cones, then we will make the Christmas trees ourselves - bake them from white dough.
1. From the rolled out dough, cut out circles of different diameters - from the largest (bottom of the tree) to the smallest (top). Use a knife to make teeth on the edges of each circle. This way we get jagged circles.
2. Bake the circles and stack them in a pyramid from the largest circle to the smaller one, coating them with glaze. To make the Christmas tree taller, you can place small round cookies, also baked from white dough, between the large parts.
3. In the same way, we collect several more Christmas trees.
4. We decorate the finished Christmas trees: place the icing, tinted green, in a bag and squeeze it out, tracing the jagged edges; Sprinkle the Christmas trees with multi-colored sprinkles, dust the top with powdered sugar from a strainer - “snowball”.
HOUSE FOUNDATION
Bake a large base crust on which to easily assemble the house. The area of the base should be larger than the area of the house (you can bake the base in parts and glue it with icing).
The glaze is used immediately, so make it after the house pieces are ready to assemble. Don't double the recipe right away; make a second batch of frosting only when needed.
3 egg whites
750 grams sifted powdered sugar
1 teaspoon vanilla
food colorings
1. In a deep bowl, beat the egg white, add sugar and vanilla.
2. Beat with an electric mixer on high speed for 7 to 10 minutes or until very stiff. The glaze should not be liquid. To prevent the glaze from drying out, cover the bowl with a damp towel.
3. It is convenient to apply the glaze for gluing parts using a small bag (from an A4 file you get 2 small bags). Roll up the bag and fasten it with a stapler along the entire length so that it does not unwind. Fill the bag with glaze and, turning the top, fasten with a stapler (so that the glaze does not come out). To prevent glaze from seeping out of the holes from the staples and getting your hands dirty, wrap the bag filled with glaze in sticky thin plastic wrap, twisting it at the top. Cut off the sharp corner of the bag straight or diagonally, just a little bit.
4. If the glaze does not stick well to the part, moisten the gluing areas with water using a brush. Glaze can be applied to both gluing areas.
5. Color the glaze of a different color (for finishing windows, Christmas trees) with dry dye.
The more accurately you make the parts of the house, the easier it will be to fit them together.
DECORATION
Baked and cooled parts can be decorated before assembly, carefully checking that the window level is the same height on all wall parts. And you can decorate after assembly.
If decorating before assembly, you must be EXTREMELY CAREFUL during assembly so as not to damage the painted windows and decorations.
On the paper pattern of the wall, draw windows evenly. In accordance with the drawing, draw windows on the walls with glaze (using a bag).
Glue waffle shutters between the windows using glaze. Decorate them with a pattern. 
Glue multi-colored squares (crumbs covered in glaze) onto the glaze along the top of the shutters and “window frames.”
2. PORCH
Make a canopy at the end of a large house. To do this, cut one square cookie diagonally into two triangles, glue the first triangle onto the icing above the drawn door.
Cut another square cookie crosswise into two identical rectangles and glue them to the first triangle in the form of the letter “/\” (see Fig. 3).
Make columns: for stability, glue lollipops onto the straws with icing, adjust the “columns” in height from the base of the house to the canopy, and glue with icing.
Cover the end of the canopy with the second triangle.
Use icing to glue a candy cane “mailbox” next to the door.
Use green glaze from a bag to edge the windows and draw garlands over the porch, glue multi-colored crumbs on them - “light bulbs”. (see Fig. 3).
JOIN ALL THE PARTS WITHOUT GLUEING THEM AND TRIM, ADJUST IF SOMETHING DOESN’T FIT (UNTIL NOTHING IS LUBRICATE WITH CREAM OR GLAZE, THIS IS MORE CONVENIENT TO DO).
House.
Prepare the "foundation of the house." Combine the parts according to the picture. Glue the parts to the base of the house and glue them together with glaze. Wait until all joints are firmly secured. For reliability, as the house is assembled, the wall joints can be coated with additional glaze on the inside of the house. 
Roof.
When the ends and walls are securely dry, you can glue the roof parts. Hold them until the icing dries. 
Chimney.
Glue three parts of the chimney together and glue them to the end of the small house. Spread with glaze and top with toasted and shelled peanut halves.
Roof tiles.
Apply glaze evenly to the surface of the roof and place the cookie pillows in a checkerboard pattern. The glaze must be thick, otherwise the pads will crawl down and you will have to hold them for a long time. Liquid glaze can be mixed with powdered sugar again. Disguise the uneven edges of the “tile roof” by edging it with glaze. Use a strainer to powder the roof with powdered sugar - “snowball”.
FINAL TOUCHES
Icicles.
Using a bag with glaze, make an imitation of icing: touch the tip to the edge of the roof, gently squeezing the bag - the glaze will flow down, forming an icicle. Repeat along all edges of the roof and along the canopy over the front door.
Courtyard.
Gluing the “pebbles” with glaze, make a “fence”. Install Christmas trees in the yard. You can make “drifts” - grease the “pebbles” with glaze and sprinkle with powdered sugar. Imagine!
What should ultimately happen - see the title. Design options: 


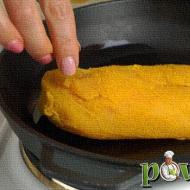
Gingerbread sleigh of Santa Claus


Paint each baked part, dry the glaze well and only then glue it together.
After gluing and hardening the joints, do the finishing: masking the seams, applying “icicles”, imitation snow, etc.
Like gingerbread houses, sleighs are glued together with sugar-protein drawing mass (icing) or hot thickly boiled sugar glaze, or solid chocolate (black or white) melted in a water bath.
DIY New Year's sleigh. Master class with step-by-step photos
Salimova Evgenia Igorevna, teacher of MBDOU KINDERGARTEN No. 65 of a general developmental type with priority implementation of activities in the social and personal direction of development of children in OrelDescription: the master class can be used by teachers, kindergarten teachers, additional education teachers, and parents to create New Year's decorations.
Target: creating a festive mood.
Tasks:
- learn to use waste material to decorate the group.
- teach to show imagination and creative thinking.
Introduction.
New Years is soon! And the most important thing is to create a festive mood in children.
We all have a New Year tree, Santa Claus with his Snow Maiden under it, gifts on New Year's Eve. But is something missing? I decided to complement the image of Santa Claus with this sleigh with a horse.
Who is Santa Claus?
Ded Moroz (Morozko) is a mighty Russian pagan God, a character in Russian legends, in Slavic legends - the personification of Russian winter frosts, a blacksmith who binds water with ice, generously showering winter nature with sparkling snow silver, giving the joy of a winter festival, and, if necessary, in difficult times. for a long time protecting the Russians from advancing enemies with hitherto unprecedented winter colds freezing into the ice, from which iron begins to break.
Everyone knows that in Russia, Father Frost rides around on a sleigh drawn by three horses, skis or walks. However, sometimes a smaller number of horses in a team is enough for him. Troika is, of course, our everything. Unfortunately, unlike Santa's reindeer, no fairy tales have yet been written about Santa's horses. So I decided to create my own sleigh and white horse for our Santa Claus.
Material:
- cardboard box 2 pieces (one for the horse, the other for the sleigh)
- PVA glue
- acrylic paint, white.
- color for acrylic paint (blue, pink)
- New Year's decorations, rain, tinsel.
Horse and sleigh templates:


Progress.
Let `s start!
We take any cardboard box. You determine the size yourself. My horse turned out to be 50cm high at the withers. Let's start with a cardboard box.

Let's draw a horse.

Then we take a utility knife and cut out the horse in the office. We draw the second half of the horse according to the office of the cut out first horse. The only thing is that I changed the position of my legs.

This is how my preparation turned out.

The position of the legs is clearly visible here.

Then we take acrylic paint and paint our blanks white. You need to paint 3 times to achieve good coverage.

While the main part of our work is drying, we draw and cut out the ears. We paint over it.

At this stage, work with the horse ends. We paint it over from time to time. While it’s drying, we’re working on the sleigh.
We also take the box and draw the outline of the sleigh. I drew the runners and the top separately. Cut it out.

Then we take PVA glue and a brush.

Glue the parts together. We make two such blanks.

We paint over it. One paint job is enough here. Since the color of the sleigh will not be white.

Now we cut out the seat from the remains of the boxes. Its size can be adjusted depending on your room. My width is 25 cm and height is 34 cm. We form the seat from two rectangles. We attach it to the runners using a stapler.

One of the rectangles is rounded at the top. Let's connect the parts together using a stapler.

We fasten the second half of the sleigh.

Our blues are ready, all that remains is to repaint them in the color you want. And decorate.


Now let's start collecting the horse. We connect the two halves with a stapler.

We'll put small spacers inside from leftover cardboard.

We fasten our ears. You can draw the ears right away; I didn’t have enough space on the cardboard, so I drew them separately.

Now let's start decorating. Let's start with the mane.
Let's take the dodge. And using a stapler we attach it to the place of the mane.

We attach tinsel on top.

While working, I decided to change her tail, and I had to cut off the drawn one.

I made it from rain. And decorated the horse. I glued the saddle, made golden hooves, and reins from snow beads. This is where your imagination works. And you can decorate it to your liking.

This is on the other side

Sift the flour with baking powder, add cocoa powder and ground ginger and cloves.
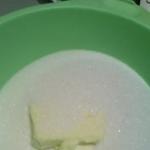
 In a separate bowl, mix butter, sugar and honey.

Melt in a water bath, stirring until you get a homogeneous syrup. Cool to room temperature.

Add an egg to the flour with spices and pour in the cooled syrup. Knead into a smooth dough. Wrap in cling film and place in the refrigerator for 1 hour.


Bake in an oven preheated to 180 degrees for 10-15 minutes.

Decorate the cooled parts with egg white glaze. To do this, you need to beat the egg whites a little with a fork (you don’t need to beat until fluffy foam), and then add powdered sugar one tablespoon at a time until the glaze reaches the desired consistency (it should not be very liquid). At the very end, add 3-5 drops of lemon juice and cover the glaze with a wet towel for 15 minutes.

The protein glaze is ready, you can get to work. To decorate the gingerbread cookies, we will need a cornet (or you can take a file and cut off a corner). Next, you need to fill the cornet with glaze and you can start decorating the gingerbread cookies. Painting gingerbread cookies depends on your imagination.
 The painted parts must be thoroughly dried until completely dry and only then can they be glued together. To glue all the parts, you need to apply a thick layer of thick sugar glaze to the surfaces to be glued, and then connect the parts. This must be done gradually so that the joints are sealed and dry.
Articles on the topic