Milk girl cake step by step. Cake “Milk Girl”: step-by-step recipe with photos. This can be done in four ways
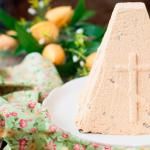
A sweet and very tasty cake with whipped cream made from shortbread and condensed milk came to us from Germany; it turns out so tender that it melts in your mouth. It is prepared in the same way - simple and not difficult, and what is also important - very tasty! It received the name “Milk Girl” because of the main product used for baking it - condensed milk.
This wonderful pastry has become quite popular recently. And there is nothing surprising here, because it is prepared very simply at home, and its composition includes products available to everyone.
In this article I will tell you how to bake a delicious cake called “Milk Girl”. If you haven’t tried it yet, I recommend doing so immediately, it’s a truly worthy option. I am sure it will not leave you indifferent! Also, rate the recipes.
Milk Girl Cake Recipe from Andy Chef - At Home with Photos

Ingredients:
For the test.
- Condensed milk - 1 can (400 g)
- flour - 160 gr
- chicken eggs - 2 pcs
- baking powder - 1 tbsp. l.
Cream filling for leveling.
- Sour cream – 350 gr
- sugar - 110 gr
- flour - 3 tbsp. l
- egg - 1 pc.
- butter - 120 gr.
Filling.
- Cream 35% – 500 g
- cottage cheese - 200 gr
- white chocolate – 50 g
- butter - 40 gr.
Cooking method:
Beat two eggs into a deep bowl, add a can of condensed milk and mix. Then add the sifted flour with baking powder and mix thoroughly using a mixer.

We distribute parchment paper on a baking sheet, take a ring (diameter 21 cm) and distribute three tablespoons of dough inside.

If you do not have a circle like the one in the photo below, then you can draw a circle with a pencil and put the dough in it.
We make several preparations and send them to an oven preheated to 180 degrees for 8-10 minutes.

After taking the finished cakes out of the oven, immediately separate them from the paper and do the same with the remaining dough.

For the filling, take 200 grams of cottage cheese and rub it through a sieve with a spoon.

Take 500 grams of heavy cream, add 4 tbsp. spoons of powdered sugar and beat until white peaks form. Transfer the resulting mass into the curd and mix gently. The delicious creamy curd filling is ready.

This cake required two portions of dough and one portion of filling.

After you have folded all the cakes, place a small weight on top and put them in the refrigerator for at least 3 hours.

To level it, we will prepare the ice cream cream and for this you need to mix sour cream 350 g, sugar 110 g, egg, flour and mix everything thoroughly. Place it in a water bath and stir constantly until cooked. At first it will become very liquid, then lumps will appear, you need to continue stirring, then the mixture will become thick. Then put it aside until it cools completely.

Beat butter at room temperature with a mixer at medium speed for 5 minutes and do the same with the already cooled thick mixture. Then combine them and mix until smooth. Place in the refrigerator for at least one hour.

After the time has passed, we take a special culinary spatula and begin to coat the entire cake with cream, first in a circle, and then the top.

Now that everything is ready, we need to place it in the refrigerator until it hardens, and then, using a culinary syringe charged with cream, make a drawing like this, where we paint one part of it yellow and continue to apply it as before.

Using a spatula, level the top and sides of our dish.

All that remains is to prepare the glaze. To do this, you need to melt chocolate and butter in a bowl in a water bath and then decorate the finished cake with berries so that it turns out something like this.

Try making this wonderful dessert too!
Video on how to make “Milk Girl” from Grandma Emma
In this video review, Grandma Emma shares a wonderful recipe for this cake - watch and evaluate the detailed step-by-step recipe.
Recipe with curd cream

Ingredients:
Dough.
- Eggs -2-3 pcs
- condensed milk - 1 can
- butter - 30 g
- flour - 1 cup (160 g)
- baking powder - 2 tsp
- salt - 1/4 tsp.
Cream.
- Cottage cheese – 300 gr
- sour cream 25% - 300 gr
- powdered sugar - 200 gr.
Cooking method:
1. First of all, beat 2 eggs with condensed milk, then add melted butter.
2. Add the sifted flour combined with baking powder and salt, then stir well to form a dough similar to pancakes, pouring out in a thick ribbon. Well, if it turns out thick and doesn’t flow from the spoon, then you can beat in another egg.
3. For the cakes, we need to take baking paper and a pencil in order to draw 6 circles with a diameter of 20 cm. Turn the pattern down and lay out 1/6 of the dough so as to level it evenly along the sheet without going beyond it border.
4. Preheat the oven to 180 degrees and place each piece in it for 5-7 minutes until blush appears.
5. Then we take it out, let it cool a little, separate the finished cakes from the paper and cut them to one size (we put the trimmings aside, we will need them later).
If suddenly the paper does not come away from the cakes well, then moisten it slightly with water, leave it for a few minutes and then easily separate it.
6. To make the cream, take soft and smooth curd, either grind it through a sieve or twist it in a meat grinder. Next, combine it with sour cream and powdered sugar. Beat until smooth, so that it is moist but not runny.
7. All that remains is to layer the cakes with cream, assemble the cake from them and decorate with finely crushed scraps and nuts. Place in the refrigerator for soaking overnight.
And in the morning we take the resulting dish out of the refrigerator and treat it to our household.
Bon appetit!!!
I’ll say right away that I haven’t tried this “Milk Girl” dessert; my daughter sent me the cake recipe with a photo, knowing that I was blogging. In words over the phone, she said that despite the fact that the recipe was simple, the cake turned out very tasty.
At first I thought that I would bake it myself, then I would share the recipe. Then I thought maybe you were looking for a delicious cake for the New Year, so I didn’t put it off. My daughter’s review of this recipe is quite enough for me personally.
I looked up information about the cake on the Internet and found out that it is quite popular. The original “Milk Girl” cake is what is baked in Germany from condensed milk “Milch Mädchen”, from the name of this condensed milk the name of the dessert was born.
“Milk Girl” - cake recipe
They make cakes from condensed milk, but our housewives use a variety of creams at home - sour cream, cottage cheese, custard. My daughter made a “girl” according to the classic recipe with cream filling. She succeeded the first time, I hope everything works out for you too, and the step-by-step recipe with photos will help you.
Ingredients
for the cakes:
- butter - 100 gr
- flour - 200 gr
- condensed milk - 1 can
- baking powder - 2 tsp.
- eggs - 2 pcs
- a pinch of salt
- vanilla sugar - 1 packet
for cream:
- cream - 400 ml
- powdered sugar - 4 tbsp. l.
- vanilla sugar - 1 packet
How to make cake layers
- Melt the butter, but let the butter cool slightly before adding it to the dough.
- Prepare the dry mixture for the dough - pour flour into a bowl, add salt, baking powder and vanilla sugar.
- In another bowl, beat eggs with condensed milk with a mixer.
- Now we proceed to the step-by-step preparation of the dough. Add some of the butter to a bowl with condensed milk, stir, then add some of the dry mixture, stir. We continue to do this in this order and the end result will be a tender dough for the cake.

- Bake the cakes in the oven, covering a baking sheet with baking paper. There is no need to lubricate the paper. The dough turns out thick, but not so thick that it would need to be rolled out. Spread it with a spoon
 and level it to size, no more than 1 cm thick.
- To make the cakes the same, you can place a ring from a springform baking pan on the paper, spread the dough inside the ring, then remove it.

- If there is no such shape, you can draw a circle of the required diameter on the back of the paper with a pencil, and carefully lay out the dough within this circle.
- Bake the cakes in a preheated oven at 180 0 minutes for 5 - 7.
 The time depends on your oven, be careful not to burn the skins. Important - do not stack the baked cakes on top of each other until they have completely cooled, otherwise they may stick together.
Cream filling cream
In order for the cream to turn out the way it should, you need to take into account several important points when preparing:
- cream must be natural with a fat content of at least 30%.
- Before whipping, the cream must be cooled thoroughly. The ideal option is if they stand in the refrigerator for a day; if this is not possible, then you can put the cream in the freezer for 30 - 40 minutes.
- You also need to cool the container in which the cream will be whipped. Place the whisks and bowl in the freezer for 15 minutes.
- filling cream made from natural cream is considered the most unstable cream and so that it does not “float”, it must be prepared immediately before work.
- Powdered sugar is a mandatory ingredient for the cream; you should not replace it with sugar if you want to get a fluffy, delicate cream with a filling taste.
All the nuances have been discussed, let's start preparing the cream. 
We begin to whip the cream with a mixer, turning it on at minimum speed. Then, continuing to beat, gradually add powder and vanilla sugar and increase the speed to maximum. As soon as the cream begins to hold its shape, turn off the mixer so that the cream does not turn into butter.
How to assemble and decorate a cake
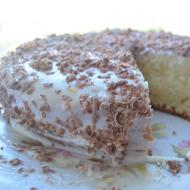
Lightly grease the cake dish with cream, then place the cake layers one by one, covering each one with cream.  This was a test version of the cake for my daughter; she decorated it with what she had - grated white and dark chocolate.
  You can make another decoration - fill it with chocolate glaze, decorate with fruits and various confectionery products.
Daughter's review of the recipe:
- She made donuts with a diameter of 26 cm, so her cake did not turn out to be high. If you want to make the cake tall, then you need to either reduce the diameter of the donuts or take 1.5 times more ingredients.
- cream cream turns out to be very delicate and is not suitable for leveling a cake, so if you want to make a perfectly smooth cake both on the sides and on top, you can use cream cream to soak the cakes, and level the cake on top with another cream, for example butter.
As I already said, on the Internet the recipe for the Milk Girl cake is made with different creams. I offer several interesting, in my opinion, creams. You can try with each of them and choose the one you like.
Other creams for the Milk Girl cake
Custard sour cream
Ingredients:
- sour cream 20-25% - 350 gr.
- sugar - 110 gr
- egg - 1 pc.
- butter - 120 gr.
- vanilla sugar
- flour - 3 tbsp. l.
How to cook:
- Remove the butter from the refrigerator in advance so that it becomes soft.
- The cream is custard, as it is prepared in a water bath. You will need two different sized pans. In the smaller one, break the egg, add sugar, vanilla sugar, beat lightly with a whisk. Add sour cream, flour, mix well.
- Pour water into a larger saucepan and put on fire. As soon as the water boils, place a saucepan with the ingredients for the cream on top and, stirring constantly, bring until thickened. This may take 5-10 minutes; the higher the fat content and thicker the sour cream, the faster the base for the cream will thicken. Cool the finished mass.
- Beat the butter with a mixer and, continuing to beat, add the cooled cream base in parts. Beat the cream until fluffy.
Curd cream
Ingredients:
- sour cream 25% fat - 300 gr.
- cottage cheese - 150 gr.
- sugar - 100 gr
- vanilla sugar
How to cook:
- Beat sour cream with sugar until completely dissolved. If desired, sugar can be replaced with condensed milk.
- Grind the cottage cheese through a sieve or break it with a blender so that there are no lumps. Mix cottage cheese with whipped sour cream well. The curd cream is ready.
Look at the cake recipe, it contains a different recipe for layering cottage cheese cake layers.
Another option is with mascarpone, watch the recipe for making a cake with this cream in the video.
“Milk Girl” - video recipe for cake with mascarpone
Happy baking.
Elena Kasatova. See you by the fireplace.
The recipe for the “Milk Girl” cake was brought to us from Germany, where famous chefs used condensed milk with the same name when making it. Despite the fact that they began to use their own products everywhere, they did not change anything. Easy to make, it is also gaining popularity for its delicate taste, and a variety of cake layers allows it to be perfectly soaked.
First, let's look at the original method of preparing this pastry.
- 140 g flour;
- 10 g baking powder;
- 2 eggs;
- 370 g condensed milk.
Guided by a step-by-step recipe, you will not make common mistakes:
- In a deep bowl, whisk the eggs with condensed milk.
- Sift the flour, mix with baking powder and only then add to the cup.
- Mix thoroughly so that there are no lumps left. The consistency of the mass should resemble pancake batter.
- For baking you will need a baking sheet and parchment paper, which we cut to the size of the sheet. In order not to make a mistake with the shape, you can draw circles on the reverse side using a suitable plate.
- Pour a couple of spoons of dough into the middle of each and level it out.
- Bake at 200 degrees until golden brown (usually each cake takes 5 to 10 minutes).
You should end up with 6 or 7 pieces, from which we immediately remove the parchment and trim the dry edges evenly. We will consider the preparation of various creams and fillings further.
Perhaps the most common assembly option used in our country.

To coat the cakes you will need:
- 120 ml heavy cream;
- 70 g butter;
- 300 ml milk;
- 120 g sugar;
- 2 tsp potato starch;
- 1.5 tbsp. flour.
Let's start preparing the cream:
- In a saucepan, mix sugar, flour and starch with a small amount of milk with a whisk, constantly adding the remaining liquid.
- When we have achieved a homogeneous mass, put it on low heat and, without stopping stirring, bring it to a boil. The mass should thicken.
- Let cool slightly and add butter. Mix.
- Separately, beat the chilled cream with a mixer, first at low speed and then at high speed.
- Mix the ingredients.
Assembling the cake is reminiscent of working with Napoleon. Decorate with chopped trimmings.
The famous chef uses a more original method of assembly.

For the “sealing” cream he takes:
- egg – 1 pc.;
- sour cream – 350 g;
- flour - 3 tbsp. l.;
- butter – 120 g;
- sugar – 110 g.
Cooking begins by mixing all the ingredients except the oil. Cook the cream in a water bath, stirring constantly.
Don’t be alarmed that at first it will become very liquid, then lumps will begin to appear. After some time it will thicken.
Cool and beat with butter with a mixer.
There will also be a filling for which we will buy:
- white chocolate – 50 g;
- cottage cheese – 200 g;
- powdered sugar – 4 tbsp. l.;
- any berries;
- cream – 500 ml;
- butter – 40 g.
We start with curd mass and butter. Mash them thoroughly together with a fork and rub through a sieve. Separately, with a mixer, beat the cream, which was previously kept in the refrigerator, with powdered sugar. Mix the two ingredients.
Let's start assembling the cake recipe from Andy Chef. For convenience, you can take a special round mold, into which we place the first cake layer and cover it with a layer of filling. Sprinkle with berries and cover with the next piece. We repeat this until the end. Cover with film and place a small weight. Let's keep it in the refrigerator for a while. For leveling, we have a “sealing” cream ready, which we use to lubricate the edges and top.
After hardening, we apply another layer, while Andy Chef suggests painting the lower half yellow. We will also change the color of the glaze (melted chocolate), which we will pour on top along the edges, and place the berries on it.
With sour cream layer
If you don't like custard or are afraid that it won't work out for you, then use this option.

Take sour cream and sugar in equal proportions (in our case, a glass) and beat with a whisk or mixer until the crystals are completely dissolved.
There is no need to be overzealous if you are using a rustic product. Otherwise you will get oil.
Dissolve gelatin in warm cream, let it brew and strain. Add to sour cream in small portions, stirring.
Please note that such a cream cannot be kept for a long time, as the mass will be difficult to level out.
With added fruit
You can diversify the taste by using fruits, which go perfectly with this cake and make it elegant.

If you use fresh ones, then after washing, be sure to let the water drain completely, remove the stalks and damaged parts. It is better to pre-soak dried fruits in boiling water.
It’s just worth noting that it’s better to add them to cream or filling. The cakes are too thin and you won’t get the desired result when you heat the dough with fruit.
With curd cream
For those who prefer this product, you can use this method.

We will need:
- 5 tbsp. l. powdered sugar;
- 200 g curd mass;
- 500 ml cream 33-35% fat.
We start by whipping the cold cream at medium speed with the mixer. Next, add powder and increase the speed. When a clear relief begins to appear, turn off the device. It's time to add cottage cheese. If the product used is coarse-grained, then it is worth rubbing it through a sieve.
Use the usual cake assembly as for the Milk Girl with the “sealing” cream.
Cake “Milk Girl” with mascarpone

Purchase in advance:
- 250 g mascarpone;
- ½ can of condensed milk;
- 400 ml cream;
- 10 g vanilla sugar.
Making cream will not take even a novice cook. Just one caveat: all products must be refrigerated. Just mix everything at once in a deep cup, first with a whisk, and then beat with a mixer until thick. When assembling, grease each cake layer and give an even appearance to the top layer and sides. Let it sit in the refrigerator.
Chocolate treat
For those with a sweet tooth who prefer to use cocoa or chocolate when baking. Diversify the Milk Girl cake recipe.

This can be done in four ways:
- Add cocoa product to the dough. It should be borne in mind that the number of spoons placed in the mixture should be subtracted from the amount of flour so that the cakes do not turn out dry.
- Mix cocoa with prepared filling or cream.
- Pour melted chocolate or glaze over the cooled dessert preparation (boil cream syrup and add margarine or butter).
- Use all of the above methods to obtain a pure chocolate treat.
How to beautifully decorate and serve a cake
The first thing that delights guests is the beautiful presentation. That is why “sealing” cream is used for the cake, which can easily be used to level the base. Be sure to trim the edges to help them soak in better.

For the top decoration, according to the original recipe, the dessert is sprinkled with chopped scraps, which can easily be replaced, for example, with nuts, chopped dried fruits or candied fruits.

Multi-colored frostings or fruits are often used. Use melted chocolate to draw shapes onto parchment paper, cool for easier removal, and set beautifully on top.
Some may think that the name of the Milk Girl cake is quite strange. But you just have to delve into the history of this delicacy, and everything immediately becomes clear. The dessert was invented in Germany, and the name originated there. The creators of the cake were inspired by a can of Milch-Madchen condensed milk, which is always added to the dough. "Milch-Madchen" translated from German means "milk girl".

Reviews of milk girl cake
Those housewives who already know how to bake a “Milk Girl” cake share their reviews on the World Wide Web. Everyone agrees that the dessert turns out tender, tasty, very sweet, but there are several nuances that should be taken into account during preparation in order for the cake to turn out:
- Choose only high-quality parchment paper. If you don’t know how to choose it, then be sure to grease it with oil during use so that the dough does not stick.
- Any stable creams can be used during cooking, because they will taste perfectly with the cake layers.
- You cannot neglect the proportions of the products when kneading the dough, otherwise you will not be able to bake an even and thin cake, and it is precisely these cakes that make up the “Milk Girl” cake.
Milk girl cake recipe from Olga Vashurina step by step with photos

Every Russian who watches cooking shows has definitely heard the name of the mother of two children, Olga Vashurina, because she became the winner of the “Confectioner” television competition. Olga suggests adding sour cream based custard to the “Milk Girl” cake and making a nut and berry filling:
- Beat 2 eggs with a whisk, and when you achieve a fluffy mass, add the contents of 1 can of condensed milk.
- Add 140 g of flour to the preparation, which must be sifted together with 10 g of baking powder.
- Knead the dough until all lumps dissolve and the dough has a uniform, smooth consistency.

- Draw a circle on a piece of parchment. Its diameter can be 20-22 cm. You need to make at least 8 blanks. Pour 2 tbsp onto each. dough and bake the cakes (baking temperature is 180 °).


- When the cakes are browned, cool them and shape them into an even shape.

- For the cream, mix 150 g of sugar with 1 egg in a bowl.
- Add 2 tbsp to the cream. flour, a pinch of vanilla and 300 ml of cream, choose fatty ones.

- Thicken the cream in a water bath (do not forget to stir it constantly). As soon as this happens, add 50 g of butter to the cream, which needs to be melted a little.
- After this, the cream is whipped to ensure a uniform structure and fluffy shape.
- The cake is very simple to assemble: each layer needs to be greased with cream and stacked on top of each other.

- Then the entire surface of the cake should also be coated with cream. If you want, sprinkle some of your favorite berries and nut crumbs between the cakes.

- Decorate the cake with the same berries you used in the filling and nuts.
Milk girl cake with filling cream

The cakes are prepared in the same way as in the previous recipe. You should use the same amount of ingredients and follow the same technology. The difference between this cake is the cream, which is prepared as follows:
- Mix 125 ml of milk with 1.5 tbsp in one container. flour and 2 tsp. starch.
- Mix everything and then add 120 g of sugar and 175 ml of milk.
- Put the cream on the fire. Cook while stirring until bubbles form.
- Remove the cream from the heat and wait until it cools. After this, you will need to beat it with a mixer, adding 70 g of butter.
- In a separate container, whip 120 ml of heavy cream. After this, they are poured into the main preparation for the cream and once again beaten with a mixer into a homogeneous mass.
You will need to assemble the cake by covering the cake layers with filling cream. The entire surface of the cake does not need to be greased to create a naked cake, which is very fashionable these days.
Video milk girl cake
Milk girl cake from Andy step by step with photos

Most housewives around the world prepare gourmet dishes using recipes from the culinary blog Andy Chef. On the site of this blog it is suggested to make several types of cream for the “Milk Girl” cake:
- one should be used for greasing the cakes, which, by the way, are prepared in the same way as described in the very first recipe of our article (this is a classic option that is always used, so we will not dwell on it any more);
- another cream is used to lubricate the entire surface of the cake.
To level the surface of the cake, Andy Chef suggests preparing a filling cream. We have already described how to make it in the recipe above. But for the filling, he suggests making chocolate curd cream:
- 0.2 kg of cottage cheese is ground with 70 g of butter and 0.1 kg of sugar. This mixture is poured with 0.5 liters of heavy cream, after which it is whipped with a mixer.
- Melt 1/3 of a white chocolate bar separately in a water bath. It is added to the main cream preparation, and then it is whipped again with a mixer.
Cake assembly:
- First, the cakes are baked according to the traditional pattern.

- Curd and chocolate cream is prepared, which is used to lubricate the cakes.

- The filling cream is being prepared to level the surface of the Little Girl cake.

- The cake is decorated with fresh flowers and seasonal fruits and berries. Chocolates and other confectionery products are welcome only for decorating the delicacy.
Milk girl cake with curd cream

The curd cream should be prepared as follows:
- grind 0.3 kg of cottage cheese through a sieve, mix the resulting mass with 0.4 kg of powdered sugar, which should be sifted through a sieve;
- add a pinch of vanilla and 70 g of butter;
- beat all the ingredients with a mixer until they are combined into a single mass.
The cake is formed in the same way as discussed in the recipes above. In this case, curd cream is used both to lubricate the cakes and to level them. As decoration, you can use coconut shavings and white chocolate candies with fruit or milk fillings.
Milk girl cake with fruits

You can give the “Milk Girl” cake an unusual taste if you prepare the most ordinary cream based on homemade or store-bought sour cream, but add fruit slices to the filling:
- First, prepare 8 cake layers for the treat.
- Beat 0.4 kg of fat sour cream with 0.1 kg of sifted powdered sugar with a mixer (this will be a cream that needs to be used to grease both the cake layers and the entire cake after it is assembled).
- Cut your favorite fruit into slices.
- Place fruit slices on top of the layer of cream that you spread on each cake layer (do not overdo the amount of fruit so as not to clog the taste of the sour cream).
- The cake is decorated with the same fruits that were used for the filling. You can also add chocolate glaze to the decor.
Cream for cake milk girl

Cheese cream goes well with cakes made with a large amount of condensed milk. This cream is made from creamy curd cheese:
- Cool 0.4 kg cream cheese and 0.1 ml heavy cream.
- Place everything in a mixing bowl, add 100g of sifted caster sugar and then beat at low speed.
- Gradually, the whipping speed needs to be increased so that the cream becomes fluffy, but at the same time dense.
Dairy-free cake cream

For the Milk Girl cake, it is quite possible to prepare regular protein cream. This is an ideal option for people who are lactose intolerant. Only the cream must have a stable shape, so you just have to add a little gelatin to it.
How to make this cream:
- Beat 4 egg whites with 200 g of powdered sugar and a pinch of citric acid.
- Gelatin is soaked separately, which, after complete dissolution, is introduced into the protein mass.
- The cream is whipped to stiff peaks using a mixer.
Milk cream recipe for cake

The cream, which is prepared on the basis of mascarpone and condensed milk, has an incredible taste:
- beat 0.5 kg of mascarpone;
- While whipping, in small portions add 100 g of powdered sugar to the mascarpone, which should be sifted in advance, as well as 350 ml of condensed milk.
How to decorate a milk girl cake
Like any other cake, “Milk Girl” can be decorated in any way you like.
We offer you the following decor options as a guide:
- The side of the cake can be sprinkled with nut shavings. Cover the top of the treat with strawberries of the same size and mint leaves. You can sprinkle almond flakes in the center of the cake, which will set off the bright red and green shades of the decor.

- Lovers of the classics will love the use of fresh flowers and whole berries for decoration:

- You can simply paint the cream in the desired colors, make flowers and other shapes out of it. You can complement this decor option with the help of ready-made confectionery products - mastic, marshmallows, marshmallows and chocolates.

Confectionery art is a magic that fascinates, but at the same time requires precision in proportions. The “Milk Girl” cake is a clear confirmation of this. We wish you inspiration in the kitchen and your household bon appetit!
Video: “How to make a Milk Girl cake”
The original recipe for the cake appeared in Germany; its main highlight is delicious creamy cake layers covered with whipped cream. The cake got its funny name from the popular Milch Mädchen condensed milk brand from Nestle, which became the main ingredient. The “Milk Girl” cake with filling cream is one of many options that are not inferior in taste to the original.
Condensed milk-based cakes may seem cloying, but the taste of neutral buttercream will correct the situation.
Ingredients:
- 380 g condensed milk (a whole can);
- 160 g flour;
- two eggs;
- 15 g baking powder.
All ingredients are mixed in a mixer. It turns out to be a liquid dough. After a quarter of an hour, bubbles appear in it - this is how the baking powder works. Now you can start baking.
- On the wrong side of the baking paper, draw a circle of the desired size.
- Line a baking sheet with this sheet.
- Pour two tablespoons of dough into the center of the circle and distribute it in the outline.
- The cakes should not be too thick. From the specified quantity of products you should get 7 - 8 pieces.
- Bake for 4 – 5 minutes at 180 ºС. The finished cake does not stick to your fingers.
The cake is assembled by coating the cake layers, top and sides with “Plombir” cream. Decorate and immediately put away in the cold.
The correct recipe for filling cream
Cream “Ice cream” in the classic version is a mixture of custard and whipped cream.


For the custard base:
- 400 ml milk of any fat content;
- 200 g sugar;
- 30 g starch;
- 100 g flour;
- vanilla extract.
The amount of sugar is an individual matter; this ingredient will not affect the consistency. The cake is made from very sweet cake layers, so the cream can be made completely without sugar.
- Sift flour and starch.
- Stir in sugar and vanilla extract.
- Add the milk little by little, whisking the mixture constantly to break up any lumps.
- Heat over low heat, without bringing to a boil. Do not stop actively working with the whisk.
- Remove from heat as soon as the liquid thickens a little. The process will continue while the base cools.
- To prevent the surface from becoming windy, place cling film on it and smooth it, expelling the air.
For the whipped cream:
- 150 g whipping cream 33% fat;
You will also need a whisk or mixer, a deep bowl for cream and a wide bowl for ice.
- The cream is pre-cooled in the refrigerator. It's best to buy them the night before. Do not keep the package in the freezer, otherwise the cream will freeze and not whip. The whisk and dishes, on the contrary, can be cooled in the freezer for half an hour.
- Place the bowl of cream in a container with ice.
- Beat for 3 – 4 minutes at low speed so as not to “catch” the cream.
- Another 5 minutes on full power until stiff peaks begin to rise behind the mixer.
To stabilize the cream in consistency, make it smooth and airy at the same time, add 100 g of softened whipped butter. The cream combines well if the cream, butter and custard base are at the same temperature.
- Beat the base thoroughly with a mixer, adding butter one spoon at a time.
- Cream is also added in parts. Now you can't beat it! The cream is gently stirred from bottom to top with a spoon to maintain the whipped cream texture.
With ice cream flavored custard
Cream “Ice cream” has several variations of preparation with different bases.

“Ice cream” on yolks:
- 4 yolks;
- 250 ml milk;
- 50 g starch;
- 150 g sugar;
- vanilla extract.
The base is supplemented with 100 g of butter and 250 ml of whipped cream.
- Pounded yolks, starch and sugar are brewed by pouring into hot milk.
- When the thickened mass begins to separate from the walls when stirred, the base is removed from the heat to cool.
- Butter and cream are added to the custard base according to the same principle as in the first recipe.
Sour cream “ice cream”:
- 500 g fat sour cream;
- 3 eggs;
- 20 g flour;
- 200 g sugar;
- vanilla extract;
- 250 g butter.
Store-bought 20% sour cream adds a slight sourness to the cream. The farm's fatty product will give the cream a softer taste. Whipped cream is not added to sour cream “Plombir”.
- All ingredients, except butter, are whisked and brewed in a water bath.
- The mixture is continuously stirred so that it does not boil and the eggs do not curdle.
- Add the whipped butter one spoon at a time into the cooled base.
Chocolate cooking option
Options are always possible: make chocolate cakes or chocolate cream. Cocoa fans will prefer both.


Ingredients for cream:
- 180 g milk;
- 100 g sugar;
- 3 yolks;
- 100 g chocolate;
- 50 g starch;
- vanilla extract;
- 100 g butter;
- 250 ml whipping cream 33-35%.
The cream is brewed in milk:
- Grind the yolks with sugar.
- Grate or melt the chocolate.
- Add all ingredients to hot milk.
- Stirring, heat until thickened.
- Add butter and cream gradually into the cooled mixture according to the general principle.
Cocoa powder is added to the crust dough. The amount of dough indicated in the first recipe will require at least 3 - 4 spoons.
In the assortment of some manufacturers you can find ready-made condensed milk with chocolate. It will not add a rich taste to a cake with classic cream. You will still have to add cocoa to the dough or brew chocolate cream.
With added fruit to dessert
The cake acquires a special taste when adding fresh or canned fruit. Any combination to taste is possible: peach, banana, kiwi, strawberry and so on. Each cake is topped with a layer of cream and thin slices of fruit or berries. To enhance the taste, you can prepare strawberry ice cream.

Required:
- 200 g of cream cheese, such as Mascarpone or Philadelphia;
- 150 g strawberries;
- vanilla extract;
- 100 g butter;
- 150 g powdered sugar;
- 10 g starch;
- 250 ml heavy cream for whipping.
The berries must be clean and dry so that no water gets into the cream.
- Puree the berries. There should be no seeds or large pieces of skin in the cream.
- Add starch to the puree.
- Heat in a water bath until thickened.
- Beat softened butter and cheese.
- Combine with cooled strawberry puree.
- Beat the cream with powdered sugar and vanilla extract.
- Add the cheese and berry mixture into the cream in parts, carefully stirring the airy cream with a spoon. Do not re-beat!
By standard, homemade quiche only lasts 6 hours in the refrigerator. A cake with ice cream and fruit lasts even less than the classic version. He shouldn't insist. This cake is assembled immediately before the feast. Of course, after drinking tea you shouldn’t leave a piece for the next day.
Recipe for “Milk Girl” cake with mastic
Decorating cakes with mastic begins with leveling the surface and sides. The question immediately arises of how to make the filling cream thick so that it fills all the unevenness well, does not drip, and the “Girl” does not become deformed after covering with mastic.
Ingredients:
- 350 g sour cream;
- egg;
- 100 g sugar;
- 100 g flour;
- vanilla extract;
- 200 g butter.
The sour cream “Ice cream” prepared according to this recipe has a dense, thick texture. It is not suitable for soaking cakes.
- The mixture of ingredients (except oil) is brewed over low heat. Don’t be afraid of metamorphoses: first the cream will become liquid, then it will thicken near the walls, and lumps will form in it. The main thing is to continuously knead the entire mass from the very bottom.
- After 3 – 4 minutes the cream will acquire a homogeneous, smooth consistency. As it cools, it will become pudding-like.
- The cream is cooled under the film, supplemented with softened whipped butter. It is important to combine the cream and butter in parts.
To create a super-strong surface, you can use Ganache cream with cream for leveling, and soak the cakes with custard “Ice cream”.
In Ganache cream:
- 300 g chocolate;
- 200 g heavy cream;
- 30 g butter;
- 40 g powdered sugar.
You can use white chocolate if you don't want a strong cocoa taste. You will need twice as much white chocolate as dark chocolate.
- Melt chocolate in hot cream.
- Add oil and powder.
- Beat.
- Cover with film in contact and cool.
- Apply and level the Ganache with a hot knife.
An important feature of the “mastic” recipe: the cakes need to be trimmed with a pastry ring. Firstly, they will be even, and secondly, they will be better saturated. It is better to assemble the cake in the same ring.
DIY dessert decoration
A delicate homemade “Milk Girl” is best decorated with fruits and berries, fresh mint leaves, natural whipped cream, stencil designs or chocolate figures. Such decorations are quickly made with your own hands. Moreover, they are sure to be eaten, and elaborate decorative elements - flowers made of isomalt, gelatin balls, or tooth-crushing confectionery beads - are only good in appearance and usually remain on the plates.

- The drawings are applied to the dry cake layer so that the rich cream does not “eat” them. The surface is thickly powdered with powder of the same color: powdered sugar or cocoa.
- A stencil is laid on top - a direct drawing or a negative - and the entire surface is again powdered with a different color.
- The stencil is very carefully removed along with the excess of the second layer.
Chocolate figures can be made flat or voluminous.
- The board is covered with cling film.
- Melted chocolate, dark or white, in any combination, in the form of clear figures or abstract strokes, lattices, and so on, is squeezed onto it from a pastry bag.
- If you cover the spread of a thick book with film, you can achieve a 3D effect. For example, this is how butterflies with curved wings are made.
- The drawing is cooled in the refrigerator. The frozen chocolate will easily separate from the film.
To create a three-dimensional figure, you need a “blank” lubricated with oil. The oil will help remove the chocolate impression.
- The base is dipped in melted chocolate and cooled. The simplest option is a small inflatable ball.
- Warm chocolate can be decorated with any sprinkles or nut crumbs.
- When the chocolate hardens, pierce the base. The remains of the ball shrink, separating themselves from the chocolate wall.
- The edge of the ball is melted with a hot knife so that it is even.
Any pastry chef knows that a cake is greeted “by its clothes.” With a little effort, the simplest homemade dessert can turn into a masterpiece of food art.
Articles on the topic