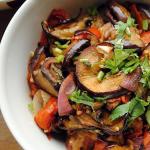
Potato cakes from dry Easter cake recipe. Easter cakes. Cake "Potato". Video
How to make a simple and delicious Potato cake
Tell
A cake that, when eaten, brings back memories of grandma, school breaks, and cheerful school corridors. Yes! This is a “Potato” cake that even a preschooler who has no cooking skills can prepare. The products are also the simplest, most affordable, found in every home. This dessert can be prepared for every day and for a holiday table, if you get a little creative and give this cake a festive design.
There are different recipes for preparing this dessert; it can be prepared from the simplest store-bought cookies, from sponge cake, from crackers, with cocoa, or with condensed milk.
Potato cake made from cookies
We prepare the simplest cake from ready-made cookies. This is exactly the option when a child can handle it too. We prepare the ingredients and go into the kitchen for a maximum of half an hour. This recipe is definitely suitable for modern busy women.
Products:
- 300 g of any, the simplest and best crumbly, for example, “Vanilla” or “Baked Milk” cookies;
- 2\3 glasses of milk;
- 100 g sugar;
- 100 g butter;
- 3-4 tbsp. l. cocoa powder;
- 1 tbsp. l. rum, cognac or dessert wine.
Let's start preparing homemade Potato cake. Heat milk and sugar, stirring. Add butter to the hot sweet mixture and remove from heat. Stir until the oil is completely dissolved.
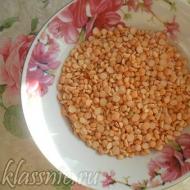
Grind the cookies. If you like a homogeneous mass in the middle of the cake, you can grind it in a blender or meat grinder. And if you like crispy pieces, grind half the cookies in a blender, and break the other half with your hands or roll them over the bag of cookies with a rolling pin.
Mix the cookie crumbs and cocoa thoroughly. Pour the warm milk-butter mixture over the cookie crumbs and mix everything. If we are making Potato cake for adults, add a spoonful of rum or cognac to the mixture, this will give the cake a rich taste. For children it is better to use confectionery essences.
We form cakes in the form of potatoes, balls, long sausages - as your imagination dictates.
Decorate the cakes by sprinkling with cocoa powder, ground roasted nuts or coconut flakes, and place in the refrigerator to cool. After 2-3 hours you can enjoy homemade Potato cake.

Cake “Potato” made from crackers, recipe with photo
A very tasty cake is obtained if, instead of cookies, you take breadcrumbs in the same volume. In this case, you should increase the amount of sugar, since crackers are not sweet. And we will prepare a “Potato” cake from crackers prepared with our own hands.
Prepare the ingredients:
- loaf 350-400 g;
- 150 g butter;
- 200-250 g boiled condensed milk;
- a tablespoon of cognac;
- cocoa powder for sprinkling;
- nuts, raisins optional.
To prepare the Potato cake with condensed milk from crackers, cut the loaf into small cubes.

Dry in the oven until golden brown.

Grind the ready-made chilled crackers, passing through a meat grinder.

Mix butter, softened to room temperature, ground crackers, boiled condensed milk and cognac.


Form a cake and roll in cocoa powder.

Cool in the refrigerator.

Cake “Potato” according to GOST
We bought such cakes as children in the Lakomka, Buratino or Sladkoezhka cafes. These cakes were different in that they had a light center at the break. This is clearly visible in the photo of the Potato cake:

The second difference is that the inside of the cake had a slightly grainy texture rather than a plastic mass. It tasted different from a cake made from cookies or crackers. To prepare it, a sponge cake was used, pre-baked and cooled. To prepare the “Potato” cake according to GOST at home, first bake a sponge cake.
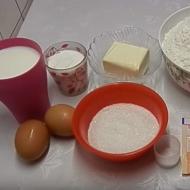
Biscuit ingredients:
- 3 eggs;
- 100 g sugar;
- 75 g flour;
- 15 g potato starch.
Carefully separate the yolks from the whites. Place the whites in the refrigerator to cool. Beat the yolks and 2/3 sugar. Separately, beat the whites and the remaining sugar until a fluffy, stable foam is obtained. Carefully mix the yolks and protein mass, add flour and starch. Knead carefully, from the edges to the center, without beating the dense dough. Pour the dough onto a baking sheet lined with baking paper and place in a well-heated oven at 200 degrees for 15 minutes. It is recommended to spread the dough not in a very thick layer, but rather spread it on a baking sheet. Do not open the oven door while baking the biscuit. We check the readiness of the biscuit after 12-15 minutes by piercing it with a dry match. If the match remains dry after piercing, the biscuit is ready. Cool the biscuit, or even better, let it sit for a day or two and dry it a little. Break the biscuit into pieces and grind in a blender.
Ingredients for the cream of the sponge cake “Potato”:
- 125 g butter at room temperature;
- 50 g powdered sugar;
- 50 g condensed milk;
- 1 tbsp. Roma;
- 2 tbsp. cocoa for rolling.
Mix the ingredients for the cream in a blender until a smooth, uniform structure is obtained. 1 tsp. The cream can be left to decorate finished cakes. Mix biscuit crumbs with cream, form cakes in the form of oblong potatoes. Roll the cakes in cocoa powder. Leave for 10-15 minutes and again add cocoa powder. We draw eyes on the finished treats with cream and put them in the refrigerator.

The classic Potato cake is prepared on the basis of a sponge cake, but savvy housewives come up with their own original recipes. For example, they use gingerbread, drying, and vanilla crackers for making. This reduces the time spent preparing the cake, but does not in any way impair the taste of the product.
- It is better to add lightly roasted or dried nuts to the middle of the cake. They will preserve and give the cake a piquant taste.
- If the cake is being prepared for children, you can use confectionery essences or honey instead of rum.
- Grandmothers used to make very tasty Easter cakes. After the holiday, there were often a lot of Easter cakes left over; they were ground into crumbs and filled with cream made from milk, butter and cocoa. The resulting mass was shaped into koloboks and sprinkled with powdered sugar.
- Butter cream for “potato eyes”: grind 1 yolk, 40 g butter and 3 tsp. Sahara. Place the cream in the corner of a plastic bag, cut off the corner and squeeze the cream onto the cakes in the form of potato eyes. Instead of cream, you can decorate with pieces of roasted nuts.
- Depending on what your tastes are, you can add different ingredients: nuts, dried fruits, candied fruits. You can add grated chocolate or orange zest.
- You can put a filling of pieces of fruit or dried fruit in the middle of the treat.
- You can also use different options for decorating cakes. You can simply roll in cocoa powder, powdered sugar, breadcrumbs or ground nuts. For a festive table, the cakes can be doused with chocolate melted in a water bath or sprinkled with coconut flakes of different colors, and decorated with pieces of marmalade.
- If your child loves Potato cake, prepare him a cake based on the cake recipe. The ready-made mass is very easy to form into a themed cake: a car, a soccer ball, a book. You can draw everything else with cream.
- You can make a “Potato” cake in the shape of hedgehogs and cones, and draw funny faces on them with cream.
- To prevent the cake from getting your hands dirty, you can place it in small paper cake pans. It will be very elegant and practical.

Cake "Potato". Video
Famous chef Gayane Brejova will tell you how to make Potato cake
Perhaps today’s recipes for the famous “Potato” are among the most popular since Soviet times. At that time, there were few baked goods sold in stores, so they baked and prepared desserts themselves. And of course, the most affordable of them was this cake.
They cooked it with condensed milk, or just milk, and sometimes even with boiled water. But invariably with cookies or crackers. Instead of butter, margarine was often used, and cocoa was sprinkled, or added directly to the “dough”.
These were all so-called home-cooked options. They were used to prepare cakes for both everyday life and holidays. And the children enjoyed making balls and blocks at the dacha in the summer, and then feasted on them with no less pleasure.
It was a different matter when we bought this dessert in Kulinariya stores or in a movie theater buffet. There, the “potatoes” were real - with a white biscuit inside and a brown crust on the outside. And the taste of such a dessert was different from homemade. It couldn’t have been any other way; he was preparing according to GOST. And this word in those days was simply magical.
In fact, of course, there are many more recipes. But those proposed today are the most basic. They have, one might say, a classic composition of ingredients and their proportions. And based on this, you can manipulate them as you want. Instead of condensed milk, add milk and sugar, instead of crackers, cookies, or leftover crumbs from cake layers.
Or you can mix them all together.
I really love this recipe for its simplicity and its taste. We all know the recipe when cookie crumbs are mixed with butter and condensed milk.
But when there is no condensed milk, this is not a reason to refuse a tasty treat. It is enough to have only a little milk. Yes, even if it is not there, you can use boiled water.

You can prepare the products in the usual form, that is, in the shape of balls or elongated bars. But today we will make them in the form of cones. In this design, they will take a worthy place even on the holiday table.
We will need:
From this amount of ingredients you will get 17 - 18 cakes.

- cookies – 500 gr
- butter – 200 gr
- milk – 1/3 cup
- cocoa powder – 2 tbsp. spoons
- sugar – 2 tbsp. spoons
- walnuts according to the number of finished cakes
Preparation:
1. For the recipe, you can use cookies, sponge cake, or crumbs from vanilla crackers. But I like this dessert with cookies. Perhaps this comes from childhood, when I prepared this delicacy together with my father.

That's why today I take regular cookies. It must be ground into very fine crumbs. The smaller it is, the more uniform the “potato” will be as a whole. Also, smaller crumbs will be better saturated with butter and milk, and this will make them even more delicious.

You can grind in a blender. And if you don’t have it, you can crush the cookies with a rolling pin on a cutting board, or grind them in a meat grinder.
2. The butter must be removed from the refrigerator in advance, this will allow it to melt under natural conditions. However, it should not be liquid. Its normal state is when it still holds its shape, but at the same time easily changes it when pressed.
3. Place a saucepan on the stove and pour milk into it. Add sugar and cocoa, stir until the powder dissolves and the mixture begins to boil. Turn off the heat and let it cool slightly. It will be enough to stand for 5-6 minutes.

4. Place the crumbs in a bowl in which it will be convenient to knead the mass. Add butter to it. I keep repeating that it is better to take it with a fat content of 82.5%, this is an excellent tasty and healthy oil, and not trans fat.

In Soviet times, it happened that margarine was also used for these purposes. Although, of course, we tried to purchase any oil, without looking at its percentage. But now is a different time, and there is a choice. Therefore, it is better to do it in the right and useful direction.
5. Mix the crumbs with butter directly with your hands. This will not only be faster, but also more convenient. You can use gloves for this. You should get such a “fat” viscous mass.
6. Pour in the cooled sweet cocoa and milk mixture. And continue stirring until the mass becomes homogeneous, both in consistency and color. Do this with your hands too. At first it will seem that there is not enough liquid, but this is not so. Continue to do your job, and soon the mass will acquire the desired state.

This will be quite easy to determine. If you take a small lump and squeeze it in your palm, it will hold its shape and not crumble. This is what we achieve, because we have to sculpt blanks of a certain shape from it.
If suddenly for some reason the mass turns out to be too loose, then you can add a spoonful of milk. If, on the contrary, it is too liquid, then you need to add more crumbs.
Although if you follow the proportions given in the recipe, such surprises will not happen.
7. Great, our “dough” is ready. Let's start creating the products. You can simply roll the balls, or give them a slightly elongated shape, reminiscent of potatoes.
And we will make the shape we have in mind. To do this, I take a tablespoon and scoop the mixture into it with a large heap. I put a nut in the middle (we still have a cone, so there must be a nut), and form a slightly elongated piece, reminiscent of a forest beauty.

8. Form all the blanks in this way. The fact that we use a spoon is great. Thanks to it, the workpieces will not only have a flat, smooth surface, but also be the same size, which will have its advantage when feeding.
You ask, “Where are the cones?” What we did reminds them very vaguely. Don't worry, everything will be fine. But it's not time yet. To create a complete and complete look, you need to place our products in the freezer for 20 minutes. Yes, yes, not in the refrigerator, but in the freezer.
9. After the time has passed, take it out and, armed with sharp scissors, make small cuts at the very tips. They will look like notches. First, make cuts along the edges of the workpiece, and then move to the middle. When one of the sides is done, the same can be done on the other. Then the cake will look, in general, like a real craft.
But if you wish, you can decorate only the front surface in this way.
If you don’t understand how to do this, then look at the video that follows. You'll see everything there.
10. From this amount of ingredients we got 17 “cones”, the time for cutting took about 10 - 12 minutes. The finished “cones” can be immediately placed on a plate. They are cold and will not stick to each other.

You can put the kettle on and invite your loved ones for a treat. The cakes are not only delicious, but also beautiful. Try it, you will definitely like it!
Video on how to cook Potatoes at home
And here is the promised video. It was created specifically for this article. It didn’t turn out to be long, just like the process of preparing our today’s delicacies. In it you will see how easy and simple everything is.
You will also see how to decorate the “bump” itself, that is, how to make notches.
Agree, it turns out very original, and not as usual. And since it’s unusual, it means it seems like something new. Our cones flew off the table in 10 - 15 minutes. With hot delicious tea. Beauty and deliciousness!!!
So be sure to try it. I think you will like the recipe!
I also invite you to subscribe to my channel on You Tube. I will be very glad to see you. Although it is still quite young, it already has interesting recipes. And their number is growing quite quickly.
Cake made from cookies and condensed milk in 5 minutes
The simplest recipe for making “Potatoes” involves combining cookies and butter with condensed milk into one. As a rule, this is one of those recipes that children master in their culinary endeavors. They are happy to mix the necessary components and mold them into balls and oval blanks.

This cake is also a favorite dessert in the country. After all, in this case, you don’t need to bake anything, and it only takes 5 minutes to prepare delicious treats for tea.
We will need:
- cookies – 650 gr
- butter – 180 gr
- condensed milk – 300 ml
- cocoa – 5 teaspoons
- nuts for decoration
Preparation:
1. First of all, we need to grind the cookies into fine crumbs. The smaller it turns out, the tastier the products will be. They will not taste like something disjointed. The crumbs will be soaked in the cream of condensed milk and butter, and we will have a real full-fledged dessert.

Almost any cookie can be used. Since early childhood, we have been preparing this delicacy from ordinary square cookies sold by weight in the store. And they always believed that the tastier it is, the tastier the cakes will be.
This may actually be true, but as I grew up, I learned that they are no less tasty from simple crackers. It couldn’t be otherwise. After all, we have both condensed milk and butter as cream.

The most convenient way to grind the base for our delicacies is in a blender. You can put them all in it at once. Previously, they could only dream of such a wonderful technique, and they would push cookies on a board with an ordinary rolling pin, or twist them in a meat grinder.
2. In a separate bowl, mix condensed milk and slightly melted butter. Therefore, it must be removed from the refrigerator 30–40 minutes before cooking.

I do not recommend using a microwave or water bath to soften it. In this case, it is better to use the first proposed method.
The easiest way to mix the mixture is with a mixer. In this case, it is much easier to obtain the desired consistency. And it should turn out to be quite dense, about the same as softened butter itself.
3. Pour cocoa into the resulting mixture. To avoid lumps from it, it is better to sift it through a sieve.

And then mix again until smooth and a new color is obtained, equally uniform.

4. Pour crumbs into the finished mixture and mix.

If desired, you can add 1 teaspoon of cognac to the mixture as a flavoring. But it is worth remembering that the products will not be baked here, and the alcohol will not evaporate. It will remain within them. Therefore, decide for yourself whether to add or not.
You can also add chopped nuts or raisins. There are countless limits to imagination in this case.

The result should be an even, homogeneous mass, which, when combined into a lump, does not fall apart, but holds very firmly.

5. Form the blanks in the form of bars, or you can make them in the form of balls. The main thing is that they all turn out to be the same size. Although someone may want to have them in different shapes.

6. You can leave our cakes the way they turned out. And you can decorate them further. For decoration, you can use any nuts, either in whole form, in halves, or in crushed parts.

7. Place the finished products in the refrigerator for about an hour and let them cool.
Then serve and invite your loved ones for tea!
Classic recipe for “Potatoes” according to GOST USSR
The basis of these cakes is biscuit crumbs. Usually, when baking cakes, there is always a lot of scraps left over. So, it was from them that they made crumbs, which were subsequently used to prepare delicious desserts, in particular the one we are preparing today.

Today we will prepare sponge cake and cream ourselves.
For the biscuit we need:
- flour – 200 gr
- eggs – 6 pcs.
- sugar – 150 gr
- salt a pinch
It happens that part of the flour is replaced with starch. But if, say, we added a spoonful of starch, then less flour should be added by this amount.
For sprinkling:
- cocoa powder – 10 g
- powdered sugar – 30 g
Biscuit for making crumbs
There are many ways to make sponge cake. We will use one of its simplest options.
It should be said that you need to bake it in advance. You can bake it in the evening, and in the morning or afternoon you can start preparing the crumbs.
So, let's begin.
1. Separate the whites from the yolks.

Pour a pinch of salt into the whites and beat them at medium speed until fluffy. Then add half the prepared sugar and continue beating until stable peaks form.

You can check whether the mass is ready by simply tilting it; it should not drain or move.

In order for the whites to whip together well, you should make sure that not a drop of yolk gets into them. It is also necessary that the eggs are fresh.
2. Now let's move on to the yolks.

Pour the remaining sugar into them and beat until fluffy. The mixture should also change in color, becoming lighter.

3. Place the whites into the yolks and then gently mix using a spatula, moving from top to bottom, from the edges to the center. Use a wooden or silicone spatula for this. It is not recommended to use a metal spoon here.

4. Add pre-sifted flour and baking powder into the mixture. It is better to sift these ingredients twice to make the biscuit more porous and airy. Add all this also gradually, constantly stirring with a wooden or silicone spoon or spatula in the same movements from top to bottom, from the edges to the center.

Mix until all the flour is incorporated and the mixture becomes homogeneous.

5. Place the oven on preheat. We will need a temperature of 180 degrees.
6. Meanwhile, cover a baking tray with baking paper and pour the resulting mass onto it, leveling it over the entire area with the same spatula that was used to mix. It’s good if the layer is at least 2 cm thick.

It is important for us that the sponge cake dries quickly, so there is no need to bake it in a springform pan, tall and fluffy. On the baking sheet it will not be high, and you can start working with it quickly.
7. Place the baking sheet with the dough in the preheated oven and bake it for 20 minutes. This time is approximate and depends on the characteristics of the oven. Some may need only 15 minutes to bake, while others may need 25.
The finished biscuit should brown, but only slightly. If you pierce it with a toothpick, there should be no batter left on it. And also, if you press on it with your finger, the surface should quickly recover.

It is not recommended to open the oven for 10 - 15 minutes, otherwise the dough will fall and the biscuit will not bake well inside.
6. Take out the finished baked goods and let them rest for 15 minutes. Then cover with another piece of parchment paper, cover the top with a large cutting board and turn the cake over. Remove the parchment paper on which it was baked and let it cool completely and set. This will require at least 10 - 12 hours.

Or is there a way to dry the biscuit faster. To do this, you need to break it into smaller pieces and dry them in the oven for an hour at a temperature of 100 degrees.
Buttercream with milk and eggs (Charlotte cream)
Before we start preparing the cakes, we need to cook the cream.
We will need:
- butter – 200 g (softened)
- egg – 2 pcs
- sugar – 4 tbsp. spoons (if you like it sweeter, then with a slide)
- milk – 4 tbsp. spoons
- vanilla – 1/4 teaspoon
Preparation:
1. Pour all the milk into a saucepan. As soon as it becomes warm, add sugar. Bring to a boil while stirring and wait until it is completely dissolved.

2. In a separate bowl, beat the eggs. You can do this with a mixer at low speed, or you can use a regular whisk.

3. Continuing to whisk continuously, pour in the sweet milk in a thin stream.
4. Then pour the resulting mixture back into the saucepan and place on low heat. Warm it up, stirring constantly, but do not bring it to a boil. Remove from heat and pour into a clean bowl.

Stir occasionally to prevent a rough film from forming on top and to allow the mixture to quickly cool to room temperature.

5. Meanwhile, beat the cut into pieces and softened butter (at about 20 - 21 degrees) together with vanilla. It is better to use a mixer for this. But if you don’t have one, a whisk will also work, or, as a last resort, a wooden spatula.

6. When the mass becomes homogeneous, without stopping whisking, pour the milk mixture into it, which by then should have cooled to the desired state.
Continue beating until fluffy.

You can additionally add 1 teaspoon of cognac, rum or liqueur to this cream. But this is optional.
We prepared this cream with regular milk using eggs, or you can make it without them and use condensed milk. And in this case there is no need to cook such cream.
Making Potato cakes
And so, we have the biscuit ready and the cream ready. Now all that remains is to combine all this and prepare our dessert, which we previously only ate at “Kulinaria” or bought in pastry shops.
1. Break the biscuit into crumbs. Since it is quite soft, you do not need to use a blender to prepare it. Just break the pieces of biscuit, they will easily take the shape we need.

2. Add some of the cream to them and mix, kneading the mass with your hands. Then add more as needed. Perhaps there will be some cream left. Therefore, do not overdo it with its addition.
In any case, you need to leave a little cream, about 2 tbsp. spoons. We will decorate our delicacies with it.
As a result, you should get a soft plastic mass, which, if gathered into a ball and squeezed, will hold its shape perfectly.
3. From such a substance it is already possible to form blanks of the desired shape and size. They can be round or oblong, reminiscent of a familiar vegetable.

4. When they were all formed, all that was left was to sprinkle them with sprinkles. To do this, mix cocoa and powdered sugar and first roll our products in the mixture, and then sprinkle on top.

5. Place all the products on a plate and make two or three small holes on top. You can use a Chinese stick for this.
6. Place the reserved cream in a pastry bag and plant “sprouts” in the holes, as if small sprouts had grown from potatoes.

That's basically all. Our cakes are completely ready and good. If you cut one of them, the cut shows that inside the dessert has light pulp, which is surrounded by a thin brown “skin”, just like a real vegetable.

Such a recipe! Of course, not as simple as the previous ones, but real according to GOST, according to the USSR recipe.
Making a cake from vanilla crackers and condensed milk
You can also make your favorite cakes from crackers. You can buy them ready-made, or you can use a dried loaf. If we consider it as one of the main ingredients, it is better to cut it into 1 cm pieces and lightly bake in the oven.
If you use a store-bought product, it is best to buy vanilla. And today I will make a cake from crackers with raisins. It’s just that they were already purchased from me and are a little stale.
We will need (for 10 cakes):
- vanilla or raisin crackers – 350 g
- condensed milk – 150 ml
- milk - 2 tbsp. spoons
- butter – 75 g
- sugar – 2 tbsp. spoons
- nuts – 1/2 cup
- cognac or vodka – 1 teaspoon
- vanillin - on the tip of a knife
- cocoa - 2 - 3 tbsp. spoons
Preparation:
1. Grind the crackers in a blender bowl. If you don’t have a blender, you can use a meat grinder with a fine grid. No one had a blender before, so it was always used for these purposes.

Pour the crumbs into a bowl. Make sure that there are no large pieces of crackers left. In general, the finer you can grind them, the tastier the finished products will be. When even the smallest crumb is saturated with milk and butter, the taste will be simply magnificent.
2. You can immediately grind the nuts in a blender. You can make them in any size - the same as ground crackers, or make them larger. Today I use regular walnuts. In general, you can use any. Or put raisins or dried cranberries instead. Or don’t add anything like that at all. In any case, it will turn out delicious.

Don’t forget to sort through the nuts so that there are no partitions or shells in the finished product.
3. In a separate bowl, beat the melted butter with a mixer. To do this, you need to take it out of the refrigerator in advance, and let it sit in the kitchen for at least 30 minutes, preferably more.
But it shouldn't spread out at all. The normal state of the oil is when it still holds its shape, but when pressed it easily gives way.

4. Pour condensed milk into it and continue stirring. The mass immediately becomes more pliable and tender, pleasing to the eye.

If you don’t have a mixer, then all this can be done with a whisk. True, it will take a little more time than when churning with a mixer, but we are not afraid of such minor difficulties!!!
5. When the mass becomes homogeneous, add milk to it, pouring in a little at a time. To make the mass less thick, I needed two tablespoons.

6. You can skip the next step, it is not mandatory. But knowing how tasty and aromatic it would be, I decided not to skip it and added cognac. Just one small teaspoon.
But what an immediate aroma! That's why I'm adding it. Not for the sake of alcohol, but for the sake of this magical enchanting smell.

There are recipes where vodka, liqueur and rum are added. But this is at the discretion of everyone. And of course – don’t get carried away!
We’ll also add a little vanilla, even if your crackers are vanilla. Just a little fresh smell won’t hurt, and even vice versa – it will add appetizingness.
If you want to decorate the cakes with cream later, leave two teaspoons of it. Place in the refrigerator for the time being so that the butter does not melt even more.
7. And so, we have a delicious aromatic cream ready, it’s time to mix it with crumbs. Pour the crumbs into the cream, or vice versa, put the cream into the crumbs, where it will be more convenient to mix. Don't forget to add the ground nuts.

8. Mix the mixture with your hands; you won’t be able to mix it thoroughly with a spoon. We should get a homogeneous mass resembling dough. And in it, as mentioned above, every crumb should be literally filled with sweet aromatic cream.
You can wear gloves for mixing and further shaping the dough.

9. When the “dough” becomes as it should be, we will begin to form our cakes.
There are several ways to do this. You can first make a “sausage”, then cut it into equal pieces and roll the pieces into the desired shape. Or just take the viscous mass with your hands and shape it.

I follow the already tried and tested path and gain weight with a spoon. I form a high hill on it. And only then I transfer the workpiece into my hands and roll out identical elongated sticks, reminiscent of potatoes. Or you can roll it into balls if you want.
Place the formed products on a plate.

10. And now we have two options. The first is to immediately roll them in cocoa powder. But in this case, they will take quite a lot of it. And this is a minus. And the second minus is that the butter will be absorbed into the cocoa and the cakes will look greasy. I showed in the photo how.

But if you first put them in the refrigerator for a short time (20-30 minutes), then when we take them out and start rolling them in cocoa, we will see a completely different picture. And I like her better.

By the way, the cocoa must be sifted through a fine sieve so that the cakes do not accumulate unnecessary brown lumps.
11. Place the finished products on a plate and sprinkle them on top again with a small amount of cocoa powder to eliminate any unevenness in the coating.
Cocoa can be mixed with powdered sugar in a ratio of 1 to 3, that is, if you take a tablespoon of cocoa, then three tablespoons of powdered sugar.
12. You can leave it in this form. But we left the cream and will decorate with it. You can use a pastry bag for this. Or you can place the cream in a regular tight bag, and cut off a small corner and decorate directly from it.
And so that the cream goes to the right place, we will pierce this place with something sharp, for example a Chinese stick.

If such a decoration is considered complex, then you can simply put half a nut on top.
You can also make another cream: for the cakes that we made, you will need 0.5 tbsp. spoons of butter and 1 tbsp. spoon of powder. Mix the components using a mixer and apply in the form of “sprouts”.
That's all, I guess. As you can see, we have a real “potato” - light on the inside and dark on the outside.
I’ll tell you right away, it turned out very tasty. We ate it right after tea. And they also complained that they didn’t do enough. And much more! The cakes are extremely high in calories. Too much is harmful!

And little by little, sometimes you can pamper yourself. So pamper yourself and your loved ones.
Friends, how do you like the recipes? Did you like the video? I hope that everything is accessible and understandable. And I hope that you understand the general cooking scheme.

- the basis of the cake is a sponge cake, or cookies, or crackers (what you can use to make crumbs)
- All cooking methods must contain butter (it is better to have 82.5% fat content)
- milk can be used both condensed and fresh
- cocoa powder is placed both in the “dough” itself and simply sprinkled on top
- You can add nuts, raisins, dried cherries or cranberries as a filler.
- vanillin, cognac, rum, liqueur are added as flavoring agents
These are the main points. And in accordance with them, you can create recipes yourself. There is nothing difficult about it.
And be sure to cook Potato, it is really very tasty.
Bon appetit!
Articles on the topic