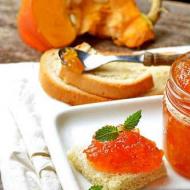
Mirror glaze for cake colored recipe. Step-by-step recipe for making mirror glaze. Chocolate sponge cake on kefir with white mirror glaze
Mirror glaze is used to decorate confectionery products, turning them into masterpieces of culinary art. Despite the apparent complexity of the recipe, such a coating is prepared simply, but it is important to strictly follow the sequence of steps. The only difficulty is that the composition includes ready-made glucose syrup, but it can be successfully replaced with other ingredients. Mirror glaze without glucose is prepared from available products at home. Instead of glucose syrup, molasses, honey, invert syrup or even sugar are added.
Mirror glaze with invert syrup
Glucose syrup is sold ready-made in plastic containers or in powder form. But what if there is no way to buy it? Don’t be upset: if you have sugar, water and a packet of citric acid at home, you have already found a way out of this situation. By mixing the components correctly and heating over low heat, after 10-15 minutes you will get an invert composition, and after hardening, the glossy mirror glaze looks as beautiful as the mixture with glucose syrup.

To prepare invert syrup, the cook's vigilant supervision is required: cook exactly according to the recipe, without leaving the stove.
The sugar crystals must completely dissolve in the water to form a viscous, clear liquid. Allow the mixture to simmer for a bit and it will take on a caramel hue. The last “chord” in preparing invert syrup is adding a pinch of citric acid, which will give the composition a pleasant sourness.
Invert syrup or a substitute for corn syrup or molasses
So, you have decided on the ingredients and now you can safely start preparing invert syrup. You will need:
- granulated sugar – 300 g;
- water – 130 ml;
- citric acid – 1/3 tsp.
The invert mixture is prepared over fire. Set the heat on the stove to medium and heat the water and sugar until it boils, continuously stirring the mixture with a spoon. This way, you “help” the sugar crystals dissolve in the water faster and prevent them from remaining at the bottom of the dish and burning. Once the liquid boils, reduce the heat. Stir the liquid continuously until it begins to thicken.

The readiness of the sugar composition is checked as follows: leave a drop on the saucer and wait a few seconds. It shouldn't blur. Hook it from the saucer with your index finger and press lightly with your thumb. Now slowly spread both fingers apart by 1-2 cm. If the syrup has turned into a thin thread, it means it is ready. Add a pinch of citric acid to the mixture and mix thoroughly. The prepared invert syrup does not differ in external characteristics from glucose syrup. And now you can prepare a mirror glaze without glucose syrup. To do this, prepare the products according to the list:
- invert syrup – 150 ml;
- sugar – 150 g;
- condensed milk (pay attention to the label: condensed milk must be made from natural cream or milk);
- water – 75 ml for mirror glaze and 60 ml for preparing the gelatin mixture;
- chocolate bar – 150 g;
- gelatin – 15 g;
- food coloring (if the chocolate is white).
Pour warm boiled water into the gelatin powder and leave to swell. Mix the future base of the mirror glaze: sugar and invert syrup. Bring to a boil and simmer for a few more minutes until the sugar crystals “melt” into the clear liquid. Add chocolate slices melted in a water bath, condensed milk and gelatin swollen to a jelly-like state. If you decide to make a colored mirror coating, then do not forget about food coloring.
Beat the mixture with a blender, because stirring with a spoon is a very tedious process; the sweet mixture will lose the desired temperature and turn into a dense lump that will be difficult to smooth over the surface of the confectionery product. The composition will be homogeneous when the components are well soluble in fat and water. Hold the blender at an angle of about 30-45 degrees and insert the wide end completely into the frosting. Avoid the formation of bubbles on the surface - they are difficult to get rid of later. As a result, you will get a delicious chocolate mirror glaze.
Video of making mirror glaze without glucose syrup
What to do if there is no glucose syrup?
At home, you can prepare glucose syrup only from ready-made glucose powder, but what else can you replace it with, besides invert syrup? There are many options: it could be honey, condensed milk, molasses. Honey gives a wonderful honey aroma to the finished mirror glaze, and molasses, when prepared correctly, will lie evenly and beautifully on the finished confectionery product, hiding its minor irregularities. Condensed milk is used as an additional component to the main ones, for example, white and dark chocolate. It is allowed to add vanilla, caramel, cream, milk.
The glossy finish not only looks great, but also provides the opportunity for your own experiments. If you add fat-soluble food dyes, which are sold in specialized stores, to the mirror glaze, you will get multi-colored compositions from which you can make magnificent colored compositions on the surface of confectionery products. Your own original drawings and intricate patterns on cakes and pastries will make them very elegant and festive - your talents will be appreciated by your family and friends.
Honey Glaze Recipe
Glasage (the name of mirror glaze in the language of culinary masters) with honey not only looks beautiful, but also has an amazing honey taste, which lovers of this natural product will really like. By adding sugar to the glaze, you can easily do without glucose syrup for the mirror glaze. To prepare the honey coating you will need:

- gelatin – 15 g;
- water – 60 ml to dissolve gelatin and 75 ml for syrup;
- granulated sugar – 150 g;
- white chocolate bar – 150 g;
- honey – 150 g;
- condensed milk from natural dairy products – 100 g;
- food coloring - optional.
Pour warm water over gelatin and leave to swell. Mix water and honey, add sugar. Place the mixture on medium heat. Continuously stir the mixture until it becomes homogeneous. In order for the sugar to completely dissolve, the liquid must be brought to a boil, and then, when it has cooled slightly, add chocolate and condensed milk melted in a water bath. The result will be a viscous white mixture (sometimes you can add milk to the syrup instead of water). Mix it with hot honey syrup, pour in the gelatin and mix thoroughly using a blender.
The mirror glaze for the cake is ready and the most crucial moment comes - spread it in an even layer over the surface of the confectionery product. Pay special attention to the following points:

- The “working” temperature of mirror glaze is from 28 to 35-38 degrees. Cool the mixture to lower temperatures if you want to create a drip effect. If you want to completely cover the cake with an even, glossy layer, the glaze temperature should be at least 35 degrees.
- Remember: mirror fondant hardens very quickly, so you need to make the glaze at the right temperature, and cover the product very quickly. Place the cake on a stand, pour the sweet mixture into the center, and rotate the cake at an angle so that the icing spreads over its surface and sides in an even layer. With such movements it must be well aligned, otherwise the expected effect will not be achieved.
- Do not allow condensation to form. Therefore, the cake or pastry must first be placed in the cold for 5-10 minutes. It is no coincidence that mirror glaze is very often used to decorate mousse-based sweet treats. Place the confectionery product in the freezer, and when you take it out, immediately begin decorating with icing.
- The recipe for colored mirror glaze involves the use of special fat-soluble dyes. Buy them in advance at the store; do not replace nutritional supplements with beet and carrot juice (although berry juice is suitable for this purpose). Although a mirror glaze with vegetable juices will not work, the mixture acquires a stunning glossy shade and bright, rich colors after adding white and dark chocolate. But it is much easier to use food coloring, because the palette of shades is varied - from blue and pink to dark burgundy and purple. Preparing dye is a fascinating process; mix additives of different colors and you will get a new shade.
Novice cooks are afraid to prepare mirror glaze, worrying that they will waste the products. But preparing the mixture is so simple and interesting that, ultimately, people get incomparable pleasure from it, and the quality of the finished glaze is pleasantly pleasing. If you're familiar with other fudge recipes, such as how to make gingerbread cookie frosting, making mirror frosting without glucose will be a breeze.
Do you like to prepare various homemade desserts and cakes, but don’t know how to decorate them effectively? Take a closer look at mirror glaze recipes.
Firstly, it can be prepared using various ingredients, secondly, it is not as difficult as it might seem, and thirdly, the finished baked goods look amazing.
Mirror glaze - general principles of preparation
The advantages of mirror glaze are that the appearance of baked goods is magnificent, complex products are not needed for preparation, the finished product can be frozen, mirror glaze can be easily painted with water-soluble paints.
The only disadvantages include the stickiness of the mirror glaze; the mass turns out to be very sweet and when cut, it can pull at the knife. But this can be avoided by cutting the cooled cake with a slightly warm knife.
The main difficulty in preparing mirror glaze is the formation of bubbles. You can avoid them if, when whipping the ingredients, you make sure that the bowl is positioned at an angle, and during the rotational movement the mass does not foam, but seems to diverge in waves. But if it so happens that the mass has foamed, you need to carefully remove the top layer with a spoon.
The mirror glaze is distributed over a perfectly flat surface, preheated to 37 degrees. The baked goods should be very cold, ideally if they lie in the freezer for about an hour before coating.
White mirror glaze
In order to prepare a white mirror glaze, use either powdered sugar or white chocolate. In the second case, the glaze turns out to be smoother and silkier, which gives the finished product a perfect look.
Ingredients:
140 grams of white chocolate;
100 ml 35% cream;
100 ml milk;
A teaspoon of gelatin;
A pinch of vanillin.
Cooking method:
1. Pour 50 ml of cold water into a glass, dilute gelatin in it. Leave the mixture aside, allowing the gelatin to swell.
2. Stir the cream with milk, place over low heat, bring to a boil, remove the saucepan from the heat.
3. Place the chocolate crushed into small pieces into the milk mixture, stir until it is completely dissolved.
4. Add swollen gelatin and vanillin. Stir and strain the delicious mixture through a strainer.
5. Cover the finished product by cooling the mirror glaze to 35-38 degrees, or put it in the refrigerator for storage, but do not forget to warm it up before application.
Mirror glaze “Colored”
Ingredients:
130 ml water;
150 grams of sugar;
10 grams of gelatin;
150 ml invert syrup;
150 grams of white chocolate;
100 grams of condensed milk 8.5%;
5-6 drops of dye.
Cooking method:
1. Pour 50 ml of cool water into a small cup and dissolve gelatin in it.
2. In a separate container, mix the syrup with the remaining water and sugar, bring the mixture to a boil, simmer until all sugar grains are completely dissolved.
3. In another bowl, melt the chocolate and mix it with condensed milk.
4. Mix the syrup with slightly warmed gelatin and chocolate mass, add a few drops of dye. Mix the sweet mass thoroughly, making sure that no bubbles form during the mixing process.
5. Cool the mirror glaze to the desired temperature, strain, and cover the baking surface.
Chocolate mirror glaze
Ingredients:
60 grams of dark chocolate;
80 grams of cocoa;
100 ml cream;
150 ml water;
230 grams of sugar;
10 grams of gelatin.
Cooking method:
1. Soak gelatin in water.
2. Mix sugar with cocoa, cream and water in a saucepan. Bring the sweet mass to a boil, remove the container from the heat.
3. Throw chocolate pieces and swollen gelatin into the chocolate mass, mix, strain through a fine sieve.
4. Cool the mirror glaze to 37 degrees, apply to the surface of the cake or dessert.
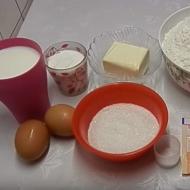
Chocolate sponge cake prepared in a slow cooker, coated with mirror glaze
Biscuit ingredients:
A glass of flour;
Seven eggs;
120 grams of cocoa;
A glass of granulated sugar;
Vanillin - to taste.
Ingredients for cream:
A glass of sour cream;
A glass of condensed milk.
Ingredients for decoration:
Walnuts.
Cooking method:
1. Pre-cool the eggs, beat them into a deep bowl, add sugar in small portions, beating the mixture with a mixer until a thick, dense foam forms.
2. Mix flour with vanilla and cocoa, sift the dry mixture through a sieve.
3. Slowly pour the flour into the egg mixture, knead the mixture with smooth movements from bottom to top, making sure that no lumps form.
4. Grease the multicooker bowl with oil and pour the dough into it.
5. Cook the biscuit for 60 minutes, setting the “baking” mode.
6. After the time has passed, without opening the multicooker lid, turn on the “warm” mode for 15 minutes.
7. Cool the finished biscuit without removing it from the bowl, with the lid open.
8. In a small bowl, beat sour cream with condensed milk until the consistency of dense thick sour cream.
9. Cut the sponge cake into two parts, brush with cream.
10. Place the cake in the refrigerator for six hours, then in the freezer for an hour or two.
11. Fill the cake with warmed chocolate mirror glaze.
12. Garnish with walnuts.
Sour cream with condensed milk and mirror glaze
Ingredients for sponge cake for one cake layer:
A glass of sour cream;
50 grams of cocoa;
Half a can of condensed milk;
100 grams of sugar;
Two eggs;
250 grams of flour;
Half a teaspoon of soda.
Ingredients for cream:
A pack (200 grams) of butter;
50 grams of cocoa;
Vanillin - to taste;
100 grams of condensed milk.
Ingredients for decoration:
Chocolate mirror glaze;
Nuts - optional.
Cooking method:
1. Beat eggs in a deep bowl, add cocoa powder and granulated sugar. Whisk again.
2. Add sour cream and soda, stir.
3. Add the sifted flour, stir the mixture until it reaches a homogeneous consistency.
4. Bake for 20 minutes at 180 degrees.
5. Thus you need to prepare the crust.
6. To prepare the cream, beat softened butter, cocoa, condensed milk and vanillin.
7. Grease the cakes with chocolate cream, put them in the refrigerator for an hour to soak, then put the cake in the freezer for another hour.
8. Pour chocolate mirror glaze over the cooled sour cream.
9. Decorate with nuts if desired.
10. Let the baked goods sit and soak for three hours.
Chocolate sponge cake on kefir with white mirror glaze
Ingredients:
A glass of flour;
60 grams of cocoa powder;
400 grams of sugar;
10 grams of soda;
A glass of kefir;
A glass of ready-made strong black coffee;
Two eggs;
Half a glass of vegetable oil;
Vanillin - to taste.
Ingredients for decoration:
White mirror glaze.
Cooking method:
1. Mix all the dry ingredients of the biscuit: flour, cocoa, soda, granulated sugar.
2. Add two eggs, a glass of kefir, butter, coffee and vanillin. Beat the dough for at least 5 minutes, it should turn out liquid.
3. Divide the mass into two parts, bake them separately for at least 30 minutes at 180 degrees.
4. You can combine the biscuits into a cake, soaking them with any cream: sour cream, condensed, protein. Or leave it as is.
5. Cool the sponge cake or cake in the freezer and fill it with white mirror glaze.
Bird's milk with chocolate mirror glaze
Ingredients:
250 grams of margarine;
Six eggs;
500 grams of granulated sugar;
400 grams of premium flour;
380 ml milk;
Two lemons;
300 grams of butter;
60 grams of semolina;
Chocolate mirror glaze.
Cooking method:
1. Melt margarine in the microwave and cool.
2. Add 200 grams of granulated sugar, soda, slaked with vinegar, and eggs, beat well.
3. Add sifted flour in small portions. Stir.
4. Divide the mixture into two even parts and bake the cakes for 20 minutes.
5. Boil milk in a small saucepan, pour semolina into it, cook semolina porridge without lumps.
6. Rinse the lemons thoroughly and grate them directly with the zest, mix with semolina porridge.
7. Mix 300 grams of sugar with melted butter, add to the semolina-lemon mixture. Beat with a mixer. Place the lemon curd in the refrigerator.
8. Place one cake layer on a dish, fill it with settled cream, and cover with the second cake layer. Place the bird's milk in the freezer for 2 hours.
9. Fill the cake with chocolate mirror glaze.
10. Keep in the refrigerator for another two hours.
Mousse cake with colored mirror glaze
Ingredients:
200 grams of soft cottage cheese;
300 grams of blueberries;
50 grams of granulated sugar;
60 ml milk;
10 grams of gelatin;
Colored mirror glaze;
Fresh fruits and berries - optional.
Cooking method:
1. Pour gelatin into a small container, pour in cold milk, stir. Set the mixture aside and let the gelatin swell.
2. Place cottage cheese, washed and dried blueberries, and sand into a blender bowl. Beat, then add gelatin and mix again.
3. Place the berry mass in the mold, put it in the freezer until completely frozen.
4. When the mousse cake has hardened to the desired condition, place the mold in boiling water for a few seconds so that you can easily remove the mousse.
5. Place the blueberry-curd dessert on a wire rack and fill it with colored mirror glaze.
6. If you only need to cover the top of the cake without touching the sides, you can leave the mousse in the pan.
7. Decorate the dessert with slices of fresh fruit and berries if desired.
You can heat up the mirror glaze before applying it in a microwave oven; if you don’t have a stove, then use the well-known method - using a water bath.
If using a wire rack to glaze the product, place the baking sheet down. The excess mirror glaze can be collected and used for something else.
Baked goods must be frozen before glazing - this guarantees even distribution of the mirror glaze.
You need to work with mirror glaze quickly, otherwise it will cool down or lie unevenly.
Minor irregularities in the mirror glaze in the form of bubbles or smudged areas can be decorated with nuts, chocolate, or meringue.
What is this, edible? And how to do it? Interesting? So read the article quickly)
For ease of understanding, we classify all possible effects with mirror glaze by appearance and immediately describe them. Let me remind you that you will find 9 wonderful, proven recipes for mirror glaze, and learn about all the secrets of working with it + a recipe for berry glaze.
MULTI-TIERED CAKE
Do you think it's not a trick? Do you know how best to cover a multi-tiered one - one at a time or all the layers together? Let it remain a secret for now….. You’ll find out a little later 😉
MARBLE
This effect is achieved by adding coloring to the glaze, which is not completely stirred. And unevenly colored icing spills onto the frozen cake.
And here you can buy EVERYTHING to create such effects - ingredients, equipment and molds!
5% discount with promo code SUPERBAKER
ZEBRA
This trick is done quite simply - make icing of different colors in two different glasses (or three different colors in three glasses). First, cover the cake with glaze of the main color, and then apply a second one, but not in a circular motion, but vertically, creating stripes. The width of the stripes depends on the speed of your movements - the slower you move the glass with icing, the wider the strip will be)
LEOPARD
Oh, this masterpiece is not so easy to do... It’s not just a matter of applying a spatula with a different color of glaze on top. I found a recipe and technique for you from Anna Felikova ( anochka413).
So, we need:
1) To cover the cake – any mirror glaze
- based on chocolate and condensed milk or cream - the main thing is that it should be fatty, i.e. fruit glaze with pectin is not suitable for these purposes
2) Actually, for the “leopard” - neutral glaze .
You can buy ready-made, or you can cook it yourself, for example, according to the recipe from Maria Selyanina’s blog:
570 g sugar
90 g sugar + 20 g pectin
1 g citric acid
Mix water with sugar. Heat to 25C, stirring constantly. Add sugar mixed with pectin and continue heating to 45C. Add glucose (to make it easier to work with glucose, you can heat it in the microwave). Stir everything, stirring occasionally, and bring to a boil.
Add citric acid, boil for 3-5 minutes.
Let cool slightly without stirring, in an open pan, a film will form on top. Strain so that the film remains in the colander. Pour into an airtight container and cover tightly with cling film. Keep refrigerated. Use 24 hours after preparation.
3) water for diluting neutral glaze
4) dye / titanium dioxide / kandurin
Our cake is ready, waiting for its finest hour in the freezer. The glaze is also ready, heated to a temperature slightly higher than the working temperature, because it will cool down a little during the preparation of the leopard composition (working temperature is 30-38C, depending on the composition). Then we prepare the mixture for the leopard: take 3 parts neutral, 1 part water and dye - mix, heat to 70C.
We take the cake out of the freezer, remove it from the mold, and place it on a wire rack or pedestal on a tray. Immediately before applying the leo, warm the pastry spatula slightly (with a hairdryer or on the stove). Cover the cake with frosting and immediately apply some! leo mixture onto a spatula. With a confident movement we move along the surface of the cake (as if we were brushing off excess glaze). You can immediately blow on top with a hairdryer (from a distance, not at minimum power, otherwise the surface will warp) so that the leo can spread out better. Let's enjoy the beauty!
CIRCLES/SPOTS
And this, as they say, is a two-way move. First, use something darker in color than the icing (chocolate, cream, berry puree, mousse) to make circles at the bottom of the mold. Then we pour in the mousse and everything else that is included in the dessert. We put it in the freezer. Well, then we pour the glaze onto the frozen base and it turns out beautifully.
You understand that in this way you can make stripes, write names, and draw pictures... In general, keep inventing.
TWO COLORS
This effect first appeared to the general public on a box containing a corresponding mold for mousse cakes. By the way, you can buy the forms
In the video you see that the chef uses a special crown; it is usually not included in the composition. But we suggest not giving up this effect, but using a metal circle or making a circle out of foil. Of course, you will have to be extremely careful when applying this, place the mold directly on the cake, and remove it very carefully, because. the icing will most likely stretch behind the ring. To avoid any voids or gaps between two colors, use a hairdryer. Blow warm air over the area where the two colors meet. The hairdryer will slightly warm up the glaze, it will become more liquid and come together on its own.
A mandatory holiday decoration is a cake. Many people want to amaze and surprise guests with the stunning appearance of this delicacy. Not everyone can afford to order a cake from professional pastry chefs. Then a new, stunning decoration option will come to the rescue, which even a simple housewife can handle. Mirror glaze for a cake will turn ordinary homemade cakes into a work of art and will definitely delight your guests.
Making mirror chocolate glaze at home is easy, the main thing is to approach this process correctly. Products required are ordinary and affordable.
In order for the glaze to turn out flawless, the temperature regime must be observed. Mousse cakes that need to be frozen are suitable for coating. Thanks to temperature changes: warm icing and ice cake, the coating will be smooth and even.
Ingredients:
- water – 30 ml for gelatin;
- cocoa – 80 g;
- sugar – 240 g;
- cream – 160 g, fat content 30% or more;
- molasses – 80 g;
- gelatin - package;
- water – 95 ml.
Preparation:
- Pour gelatin into a bowl and add water. Set aside.
- Pour the remaining water into the pan and add sugar.
- Add molasses, stir. Boil.
- Remove from the stove.
- Heat the cream separately.
- Mix sweet, hot water with cream.
- Mix.
- Add cocoa. Stir.
- At this time, the gelatin should become swollen. Heat. Mix.
- Pour into saucepan with cream. Mix.
- Take a high container. Pour mixture.
- Prepare the blender.
- Place in container. Beat.
- The temperature regime should be strictly followed. For the mass to be ideally distributed, 37 degrees is required. If the temperature is lower, it should be heated, if the temperature is higher, it should be cooled.
Color mixture for decoration
Try making the mirror glaze colored. It will perfectly decorate your baked goods. A simple decoration will make the dessert look delicious.
Ingredients:
- sugar – 150 g;
- gelatin - pack;
- water-soluble dye – 5 ml;
- molasses – 150 ml;
- condensed milk – 100 ml;
- white chocolate – 150 g;
- water – 75 ml.
Preparation:
- Soak the gelatin according to the instructions on the package.
- Pour sugar into a saucepan and add water.
- Add molasses and stir.
- When the sugar has dissolved, pour in the gelatin.
- Place the chocolate, broken into pieces, into another pan and melt. You should use a quality product; a cheap type of chocolate will not work. The appearance of the glaze depends on the quality.
- When the chocolate mass has melted, pour in condensed milk. Next is the resulting syrup. Stir.
- Pour in the dye and beat with a blender.
- While whipping, you need to watch for bubbles, there should be few of them.
Caramel gloss
There is nothing more beautiful than a cake that has a mirror image. The glaze, evenly distributed over the delicacy, is mesmerizing and eye-catching. This dessert does not require special decoration.

Ingredients:
- gelatin – 10 g;
- instant coffee – 1 tbsp. spoon;
- sugar – 360 g;
- cream – 290 g;
- water – 290 g.
Preparation:
- Pour water into the pan, add sugar.
- Boil until the syrup acquires a caramel color.
- Boil the cream in a separate container and pour into the caramel. Mix.
- Boil for a couple of minutes.
- Gelatin must be soaked according to the recommendations indicated on the bag.
- Combine with caramel mass, the temperature of which is 60 degrees.
- Mix. Strain.
White cake icing
Ideal for mousse cake that has been in the freezer for at least 12 hours.
Ingredients:
- glucose – 150 g;
- white chocolate – 150 g;
- sugar – 150 g;
- gelatin – 10 g;
- water for gelatin – 60 ml;
- condensed milk – 100 ml;
- water – 75 ml.
Preparation:
- Pour water into the pan, add the amount of sugar, add glucose. Boil. The sugar should completely dissolve.
- Melt the chocolate separately and mix with condensed milk.
- Mix gelatin with water and leave. Melt. Pour into syrup. Mix.
- Pour into chocolate mixture. Beat. A blender will handle this task.
- Cool to 38 degrees so that the icing fits perfectly on the cake.
Honey based recipe
Many people are afraid to take on the task of preparing glaze, believing that it is a complicated process and that nothing will definitely work out. It is very easy to make glaze at home using simple ingredients.

Ingredients:
- sugar – 150 g;
- any dye can be used;
- condensed milk – 100 ml;
- water – 60 ml for gelatin;
- water – 135 ml;
- white chocolate – 150 g;
- liquid honey – 150 g;
- gelatin – 12 g.
Preparation:
- Pour gelatin into a container and add water. Let stand according to instructions.
- After this, you cannot melt or bring to a boil.
- Pour sugar into the pan.
- Pour in honey. Fill with water, you will need 75 ml.
- Boil.
- Melt the chocolate separately. You can't overheat.
- Pour chocolate into a tall container. On top - condensed milk.
- Pour in honey mixture.
- Stir.
- Pour in gelatin.
- Add some dye and stir.
- Turn on the blender, beat.
- Take a sieve. Spill the mass. This will help get rid of the bubbles.
Mousse cake with mirror glaze
This is a dessert that is delicate on the inside, delicious and elegant in appearance.

Ingredients:
For the strawberry confit:
- fresh strawberries – 260 g;
- water – 35 ml;
- lemon juice – 1 teaspoon;
- rum – 4 teaspoons;
- gelatin – half a pack;
- sugar – 80 g.
For the chocolate mousse:
- water – 60 ml;
- gelatin – 10 g;
- white chocolate – 85 g;
- sugar – 4 teaspoons;
- cream – 250 ml (first portion);
- vanilla sugar – packaging;
- cream – 150 ml (second portion);
- egg yolk – 2 pcs.
Glaze:
- dye – 1.5 g;
- white chocolate – 150 g;
- condensed milk – 100 ml;
- invert syrup – 150 ml;
- sugar – 150 g;
- gelatin – 10 g.
For the almond brownie:
- sugar – 90 g;
- white chocolate – 50 g;
- ground almonds – 30 g;
- butter – 90 g;
- dark chocolate – 50 g;
- egg – 2 pcs.;
- wheat flour – 50 g;
- dark chocolate – 90 g.
Preparation:
- First you need to make the brownies by melting the butter.
- Melt the chocolate separately.
- Pour sugar into a container. Pour in the oil. Mix.
- Add chocolate. Beat.
- Pour in the eggs.
- Add almonds, then flour. Stir.
- Pour into mold.
- Place in the oven. 160 degree mode.
- After cooking, cool.
- Now it's the turn of the confit. Place strawberries in a saucepan and add sugar. Cook.
- Soak the gelatin.
- After swelling, combine with strawberry mixture.
- Pour lemon juice.
- Add rum. Mix.
- Pour the mixture into a silicone mold and freeze.
- Prepare chocolate mousse. To do this, pour two types of sugar into the pan. Pour in the yolks.
- Grind.
- Heat the cream (the first portion), it should become hot.
- Pour over sugar. Boil until the mixture thickens.
- Soak the gelatin.
- Cool the thickened mass slightly. Place the gelatin, which has already swelled by this point.
- Place the chocolate pieces.
- Turn on the blender, beat.
- Separately, pour the second portion of cream into the container. Beat.
- Add to mixture. Mix.
- Use a pan larger than the brownie size. Place half of the mousse. To freeze.
Cake assembly:
- Place strawberry confit on top of the frozen mousse.
- Pour in some of the remaining mousse that has not been frozen.
- Cover the brownie.
- Fill the free space in the mold with the remaining mousse. Place in the freezer for 12 hours.
Glaze:
- Pour glucose syrup into the pan.
- Add sugar.
- Pour water. Mix. Boil.
- Pour the grated chocolate into the pan.
- Pour in condensed milk. Mix.
- Soak the gelatin in advance. When it swells, melt it.
- Pour into the pan.
- Add dye.
- Beat.
- Remove frozen pastry from pan.
- Place the cake on a wire rack.
- Place a baking sheet underneath.
- The glaze should have a temperature of 33 degrees.
- Drizzle over the cake.
- When the mass has set, decorate with sheet chocolate.
- Place on a plate.
Cooking secrets and tricks
- Bubbles can ruin the whole look. To ensure that there are few of them, you need to hold the blender correctly, the mass should be drawn into one stream. To do this, place the device at a slight angle. If it was not possible to beat correctly and a lot of bubbles have formed, you can remove them with a spoon or pass the mass through a sieve.
- The glaze does not completely harden on the treat. Therefore, it is not very convenient to cut; the mass drags behind the knife. To avoid cutting problems, you need to heat the knife and keep the cake cold.
- To make it easier to move the drenched treat onto the dish, use a spatula or kitchen spatula.
- For the glaze to be perfect, the temperature must be maintained. If the mass is cold, it will roll off the surface and the mirror effect will not work. If the heat is too high, you will get drips that will ruin the appearance of the cake. Always use a food thermometer to help you reach the desired temperature.
- The finished glaze can be stored in the refrigerator for several days. Before use, warm the composition to the desired temperature.
It's nice when the cake not only tastes great, but also looks amazing. As French champion Guillaume Maubier says, “The eye buys.”
This glaze recipe has become universal for most confectioners on the planet. I think many of you are familiar with him. It has many advantages and several disadvantages. But the most important thing is that you can easily prepare and use it in your kitchen and you will succeed!
300 g glucose
300 g sugar
150 g water
200 g condensed milk
300 g chocolate (white, milk or dark)
20 g gelatin
Soak gelatin in cold water. Bring sugar, glucose, water to a boil. Pour over condensed milk, chocolate, squeezed soaked gelatin. Add dye. Beat with a hand mixer. Leave the frosting in the refrigerator overnight. Warm up and use at 35 C.
Benefits of the recipe:
Appearance, stunning glamor
- cake with frosting can be frozen
- the glaze is easily painted with water-soluble paints
- prepared from simple ingredients
- applicable to all types of frozen cakes
Disadvantages of the recipe
The icing is very sweet and can stick to a knife when cutting - the cake should be cut when it is still very cold, with a warm knife. Or don't freeze.
- It’s very difficult to take a photo of a cake without being reflected in it. The glaze is really mirror)
Difficulties in preparing glaze, how to solve them
The main difficulty is the appearance of bubbles on the surface. How to deal with them? When you have poured hot water, sugar, glucose onto the chocolate, condensed milk and gelatin, you put them through a blender and add coloring. Position your hand mixer at an angle to create a bubbly, streaky wave. Make sure your hand mixer does not create foam. Cover the icing with cling film. Leave it in the cold until tomorrow. When the glaze has set, remove the film. If there were a lot of bubbles, skim off the top foam. Warm the glaze to 35 C. The glaze can now be punched, you will feel that now its tendency to generate foam is much lower than when it was completely fresh. At the same time, watch the angle of your hand mixer - avoid bubbles.
If the glaze is very thick at 35 C, then add 1:1 syrup. The next time you make the glaze, remove it from the heat just as it boils.
Ideal surface
In order for the glaze to be distributed evenly, it must be applied to a completely flat surface. This surface is obtained by freezing.

If you are assembling the cake in a ring, place cake ring tape along the sides. After freezing, the ring will be easily removed from the mold thanks to this tape. When you remove it from a well-frozen cake, the sides will be mirror-like. Run a warm wrist over the sharp top edge of the cake - it will look softer, without sharp edges and the icing will flow easier.
Condensation is something to avoid. If there was condensation on the surface of the cake when you applied the frosting, the frosting will likely wrinkle by the next morning in the refrigerator. Everything will remain stable in the freezer.
Before you take the cake out of the frost, prepare your work area:
· Glaze in a container at the required temperature - 35 C - 38 C.
· Spatula with a neck for removing excess glaze
· A grid placed in a container where excess glaze will drain

Coloring the glaze
Our recipe contains water - water-soluble paint has something to dissolve in. That’s why we mainly use water-soluble paints for painting.

For a pearlescent effect, I add gold powder to the glaze. For the same recipe, more expensive fat-soluble dyes are sometimes used; it happens that they give particularly bright shades. White is a special dye that dissolves in both chocolate and water.

To get any color and shade, I use the color mixing table http://2mb.ru/poleznoe/tablica-smeshivaniya-cvetov/. I made the lavender colored icing by mixing white, pink and blue.
I applied purple icing to the white icing. Both glazes have a temperature of about 35 C when applied.

Before applying the design, leave the covered cake in the freezer for 5-10 minutes and then feel free to draw on the surface.

A small number of strokes of a different color on the main one looks elegant. When there are many strokes, the “Japanese” style and value of each line fades away with more of them. Therefore, use it in moderation.
Where else do we use this glaze recipe?

The glaze looks great on a veiled surface.

At one of the master classes, we decorated the table with daisies from mastic and made a burning yellow eye for them from glaze. The middle of the chamomile burned with yellow fire - it looked impressive.

When this buche was photographed, the glaze was sprinkled on the marble surface - it turned out artistic.
Photos for this post from a real friend -
Articles on the topic