Andy chef Victoria cake. Cake "Victoria" Recipe from Andy Chef
Description
Queen Victoria's sponge cake got its name due to the origin of this delicacy. It has long been noticed that the prim English, who love order and value balance in everything, prefer simple and natural dishes. The proposed baking recipe is no exception.
There is a legend that it was this delicacy that was usually served at tea parties in the royal palace. Over time, this became a tradition, and now in many foggy houses Albion and far beyond this amazing classic sponge cake takes pride of place.
Any housewife can easily and very quickly make Queen Victoria sponge cake with her own hands at home. This baking will be perfect even for the most inexperienced and novice pastry chefs. This is facilitated by both the ratio of ingredients and the ease of the process itself from kneading to decorating the cake.
The ingredients that make up Queen Victoria's sponge cake are not difficult to find on the shelves of supermarkets and grocery stores with an average assortment. You also don’t need any special equipment for baking cakes: a regular oven or a slow cooker will do.
The step-by-step recipe with photos clearly shows the entire cooking process from start to finish. All that remains for cooks to do is clearly measure the required amount of ingredients and listen to advice. You can be sure that this method of preparing English biscuits will supplant all the methods of baking cakes you know, and the recipe will add to your personal collection with the note “You will lick your fingers!”
Ingredients
-
(250 g) -
(250 g) -
(3 pcs.) -
(82.5%, 250 g for dough + 250 g for cream) -
(8 g) -
Lemon zest
(2 tbsp.) -
(2 tbsp.) -
(1 tsp for powder + 2 tbsp for cream) -
(250 g) -
(15-20 berries) -
(jam, 4 tbsp.)
Cooking steps
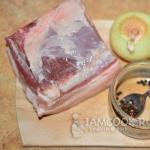
Let's start making Queen Victoria sponge cake by preparing all the necessary ingredients for baking the cakes. All the products that we will need are shown in the photo.

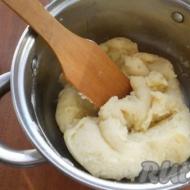
Let's start the cooking process by mixing chilled butter with granulated sugar. Knead thoroughly until the mixture becomes homogeneous, and then finally beat the sweet butter using a mixer.

After the first stage of cooking is completed and the mass acquires a shiny appearance, begin adding chicken eggs one at a time. After adding each egg, beat the mixture for a minute.

In a separate bowl, mix the measured amount of flour and baking powder, and then add them in fractional parts, without stopping kneading in the main bowl. The dough should be thicker than for a regular sponge cake..

Once all the flour has been used, add vanilla essence and lemon zest to the dough, then mix well again.

Transfer the dough into a baking dish, on the bottom of which lay oiled parchment of the desired shape and size. Level the mixture using a spatula. It is also recommended to coat the walls of the mold with butter and lightly sprinkle with flour. This will make it easier to remove the finished cakes and allow you to maintain the desired shape. You can bake two cakes or prepare one tall piece, and then carefully cut it using a special tool or a sharp knife. Just keep in mind that you need to cut the cake when it has completely cooled.

Preheat the oven to 200 degrees Celsius and then place the pan with the dough in it. Reduce heat and bake the crust for twenty minutes in the oven at 190 degrees Celsius. Periodically check the readiness of the sponge cake with a wooden skewer: when the dough stops leaving a mark on it, feel free to remove the sponge cake from the oven.

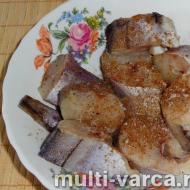
The finished cake should look like in the photo. It may have a slight rise in the center, which in most cases will sink as it cools. Cool the cake on a wire rack for five minutes, then turn it upside down and leave for another fifteen minutes. After the time has passed, wrap the workpiece with cling film.

When the cakes are barely warm, place them in the refrigerator for two hours. This will allow the workpiece to become slightly moist and improve the taste of the finished sponge cake. Meanwhile, prepare the buttercream by mixing the indicated amount of ingredients using a mixer.

After an hour and a half has passed since placing the cakes in the refrigerator, begin preparing the berries and jam. Rinse the strawberries (raspberries) carefully in cold water and then remove the stems.

Heat the finished jam in the microwave for 30 seconds. Cut the strawberries as in the photo. If you use raspberries, leave the berries whole. Leave a few raspberries or one strawberry to decorate the assembled sponge cake.

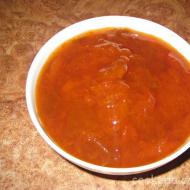
Mix the jam and berries until smooth, as shown in the photo.

Remove the cake layers from the refrigerator and begin assembling the sponge cake. To do this, place the first cake layer on a flat base, and then place the berry mixture and jam on top of it. Don't try to cover the sponge cake completely: the soft puree will do it on its own. Carefully spread the buttercream over the berries. The easiest way to do this is with a pastry bag, then you will get it exactly as beautiful as in our photo.

Cover the decorated sponge cake with the second cake layer and lightly press the top cake layer with your hands. Dust the top with powdered sugar, garnish with the remaining strawberries or a few raspberries and serve immediately—English Queen Victoria sponge cakes require no soaking.

Bon appetit!
This favorite British pastry, Queen Victoria's sponge cake, has gained popularity all over the world. Many housewives prepare it for their children and guests, without even suspecting that the biscuit bears a royal name.
According to the classical scheme, the sponge cake is prepared very simply and quickly, and does not require a large number of ingredients or skills. All basic elements are taken in the same quantity plus 4 eggs.
It’s amazing how a biscuit with such a simple recipe is incredibly popular in England!
According to the official version, Queen Victoria had a lady-in-waiting who had a very difficult time waiting for a meal between lunch and dinner. And she came up with afternoon teas - tea parties with sweets, which took place around 4-5 pm. The maid of honor invited all the ladies of the court and the queen to her tea parties.
After some time, the queen herself began to organize similar salon afternoon teas, and the obligatory sweet for tea was always a sponge cake, very beloved by the queen, with a juicy filling - fruit or berry jam or butter cream. Due to royal preference, it received this name.
According to another theory, after the death of her husband, Queen Victoria isolated herself from secular society, and only a few years later the ladies of the court persuaded her to give afternoon teas with sweet tea in the palace garden so that the world could see the queen. The empress's tea table always had a constant dessert - sponge cake with berry jam in the middle.

Thus, Queen Victoria's sponge cake has come from the 19th century to the present day and remains a delicious pastry, despite its simplicity.

- a glass of pancake flour;
- a pack of premium butter;
- a glass of sugar;
- 2 tbsp. l. milk;
- four eggs of category C1;
- 1 tsp. baking powder.
How to bake a traditional English sponge cake:
- Turn on the oven and leave to warm up. The dough cooks so quickly that the oven doesn’t even have time to heat up.
- Prepare the dough - mix all the ingredients and pass through them with a mixer or immersion blender until a fluffy puree-like mass is formed.
- Line the baking dish with a baking sheet.
- Pour the dough into it.
- Bake for 20 minutes.
The secret to a delicious sponge cake is to leave it to cool in the oven or, after taking it out, cover it with a thick napkin or towel. This way it will remain soft.
The sponge cake can be decorated with fresh berries, powdered sugar, chocolate chips, or topped with condensed milk or chocolate icing.
Andy Chef is the most famous and popular food blogger from Khabarovsk. Everyone is incredibly delighted with his baking recipes, and the photographs of step-by-step recipes will not leave anyone indifferent - you just want to cook a delicious sweet.

Ingredients for the recipe from Andy Chef:
- sugar - 250 g;
- premium butter - 250 g;
- four eggs of category C1;
- flour - 250 g;
- baking powder - 8 g;
- vanilla - 2 tsp;
- lemon zest - a small handful.
In the cook’s recipes, it is important to follow all the subtleties in order to get a similar result:
- Mix softened butter with sugar. Beat with a mixer until fluffy.
- Throw eggs into the mixture. Go through the mixer adding each egg.
- Mix the flour and baking powder thoroughly.
- Pour the flour into the butter mixture and run the mixer through the process.
- Add vanilla and zest.
- Grease the oven dish with oil. The optimal size is 10 cm in radius. Sprinkle some semolina.
- Place 1/2 of the dough into the mold - it is quite dense. There is no need to worry about this; the finish will be the most delicate and soft sponge cake.
- Bake at 190 degrees.
- As soon as the surface begins to turn golden, check the sponge cake with a match. It is important not to overbake it - otherwise it will be dry and hard.
- When ready, remove the pan from the oven. Place it on the grid, upside down, to cool for a quarter of an hour.
- Remove the biscuit from the mold by running a knife along the sides and bottom. Let cool. Wrap in a towel and place in the refrigerator.
- Repeat with remaining dough.
- Place both biscuits in the refrigerator for two hours.
Berries are perfect as a filling - for example, raspberries. Mix them with warmed berry jam or homemade preserves. Frost one of the biscuits and place the second one on top. Sprinkle the resulting cake with powdered sugar through a strainer. According to Andy Chef's recipe, butter cream is also added to the layer.
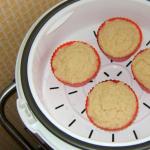
How to make it in a slow cooker

You need to prepare:
- a glass of flour;
- a glass of sugar;
- a pack of premium butter;
- three eggs of category C1;
- a packet of baking powder;
- 2 tbsp. l. milk fat content 6%;
- 2 tsp. vanilla.
Cooking step by step:
- Grind soft butter with sugar. Go through the mixer.
- Add the eggs after whisking them. Keep the mixer running as you add.
- Add vanilla essence there too.
- Mix baking powder with flour. Sift several times and then add to the whipped mixture.
- Pour in the milk.
- Stir the mixture with a large spoon.
- Warm up the multicooker - pour liquid into it and turn on the cooking mode for a quarter of an hour. When the unit has warmed up, pour out the liquid, dry the bowl and fill it with dough.
- Set the timer for one hour.
English butter cake

Compound:
- premium butter - 250 g;
- sugar - 250 g;
- flour - 250 g;
- four eggs of category C1;
- vanillin - sachet;
- lemon zest - a handful;
- baking powder - 8 g.
For filling:
- Strawberry jam;
- condensed milk - half a can;
- butter - half a pack.
Preparing butter sponge cake:
- Place all the ingredients in a large bowl.
- Let's go through them with a mixer or blender.
- Let's warm up the oven.
- Place the dough on a baking sheet or in a frying pan with a heat-resistant handle.
- We will bake for 25 minutes, checking for doneness with a skewer.
- When the biscuit is baked, leave it to cool slightly.
- Let's prepare a layer - beat the butter. Gradually add condensed milk until it becomes creamy and fluffy. Beat for quite a long time, about 15 minutes at high speed.
- Cut the biscuit into 2 layers.
- Spread the cakes with strawberry jam, making a thicker layer in the center so that the cakes do not separate.
- Spread the buttercream soaked with jam into the cake layer and cover with the second one.
Decorate the resulting cake with fresh whole strawberries, blackberries and raspberries and powdered sugar or coconut.
Cooking with chocolate

What is needed:
- sugar - glass;
- flour - a glass;
- a pack of premium butter;
- vanilla - 2 tsp;
- orange zest - a handful;
- four eggs of category C1;
- baking powder - 8 g;
- chocolate bar;
- butter for cream - 200 g;
- powdered sugar;
- fresh strawberries - for decoration.
Let's prepare it step by step:
- Place sugar, vanilla, orange zest, softened butter in a large bowl and run through with a fancy mixer.
- Add eggs one by one, beating after each.
- Add flour and stir.
- Turn on the oven
- Using a nylon spatula, place the dough on a baking sheet and bake for a quarter of an hour.
- Once the biscuit is ready, turn it out onto a wire rack and do not touch it until it cools completely.
- Prepare the cream - mix butter with powdered sugar, beat into a strong foam.
- Cut the biscuit into two layers. Spread with any berry jam and cream.
- Pour melted chocolate over the surface. Decorate with strawberries. It's good to add mint leaves for decoration.
To make the glaze soft, add a little milk, butter and cocoa to the melted chocolate.
Queen Victoria's Butter Sponge Cake

What do you need:
- sugar - 250 g;
- premium butter - 350 g;
- flour - 250 g;
- four eggs of category C1;
- baking powder - 1 tsp;
- vanilla;
- lemon zest - 1 tbsp. l.;
- medium fat cream - 200 g;
- powdered sugar - 30 g;
- raspberry jam;
- raspberry berries.
Cooking:
- Mix first 7 ingredients. Knead the dough.
- Grease the mold with oil, line with paper and lay out the dough.
- Bake at 190 degrees for about a quarter of an hour.
- As soon as the pastry begins to brown, check the readiness with a splinter.
- Remove and let cool.
- Prepare the cream - beat the cream and powder.
- Cut the cooled biscuit in half.
- Spread the cooled cakes with berry jam.
- Place buttercream and several raspberries in a 1 cm layer.
- Cover one cake with another and completely grease the surface and sides with the remaining cream.
- Decorate with raspberries.
Active time:
Passive time:
Rating
Recipe rating:5 out of 5
I suggest you prepare a biscuit named after Queen Victoria - the Queen of Great Britain and Ireland, whose reign brought the greatest development and flourishing of the British Empire.
“After the death of her husband Prince Albert in 1867, the grief-stricken Queen Victoria retired from society. They say that a few years later she was persuaded to start giving garden parties so that the courtiers could again see the empress at tea parties, where a fluffy sponge cake layered with jam or "liquid berry jam. It was this that came to be called "Queen Victoria's Cake" or Victorian sponge cake."
A prerequisite when preparing a sponge cake is an equal amount of butter, flour and sugar. Liquid jam is used for impregnation. Sprinkle the sponge cake with raspberries or strawberries. In its modern version, Queen Victoria's sponge cake is often prepared in the form of a cake and cream is added to it. The sponge cake has a porous, delicate and slightly moist structure, with the aroma of vanilla and a subtle aftertaste of orange zest, buttercream and sweet and sour raspberries. I poured melted chocolate over the top of the cake. It’s tasty, but not convenient, since the chocolate hardens and is difficult to cut. It is better to use chocolate ganache for this. You can see how to prepare it in the recipe.
The composition is duplicated with clarifications and a link to the recipe for kiwi curd
*from this amount of dough you can make
1 cake with a diameter of 22 cm, made of two layers
1 cake with a diameter of 20 cm, made of three layers
2 cakes with a diameter of 16 cm, each of two layers
for Sponge cake
225 g butter
225 g sugar
225 g flour
4 eggs
2 tsp baking powder
2 pinches of salt
for strawberry filling
300 g strawberries (fresh or frozen)
1 tsp starch
2 tbsp. lemon juice
sugar to taste
+ kiwi curd
+ 400 ml cream 35% fat (for whipping)
+ 80 g white chocolate (to set the cream)
powdered sugar (optional)
Preparation:
Beat the softened butter with sugar until smooth (you can do this by hand, or you can use a stationary blender).
*Use fine sugar to help it dissolve faster.
Add eggs one at a time, stirring each time until smooth.
*Eggs should be at room temperature.
Sift the flour with salt and baking powder and add to the dough, mix.
The dough looks like buttercream.

Place it in the pan, smooth the surface and bake at 180 degrees. Approximate time 30 minutes. Smaller cakes may bake a little faster
*Do not open the oven ahead of time, the sponge cake may fall off.
Allow the cake to cool slightly in the pan, then carefully remove, cool completely and cut into two halves.

Prepare kiwi curd. Cool it completely. If the curd seems watery to you, then add 1-2 g of gelatin to it. If the gelatin is sheet, then soak in cold water, then squeeze out, heat a few spoons of curd, dissolve the gelatin in them, mix with the remaining curd. Soak the powdered gelatin in a small amount of water (there should be very little water), then heat it in the same water and add it to the curd).
*I added half a leaf of gelatin (1 g) to the curd
Prepare strawberry filling:
Cut the strawberries into pieces (if fresh). Defrost the frozen one, do not drain the juice. Add lemon juice and a couple of tablespoons of sugar to the strawberries, stir, put in the refrigerator for 3 hours.
After this, drain the resulting juice, dilute it with water to about 150 ml, add a little lemon juice or Limoncello liqueur to taste, and a little more sugar. Use this syrup to soak the cakes.
Grind the strawberries in a blender, put on fire and heat. Dilute the starch with a teaspoon of water, mix and pour into the strawberries in a thin stream, stirring. Cook over low heat until thickened, stirring constantly. Cool the filling.
Whip the cream to soft peaks, you can add 1-2 tbsp. powdered sugar. Break the white chocolate into small pieces and melt in a water bath (be careful not to overheat the chocolate!). Gently pour the white chocolate into the cream, spoonful at a time, whisking at medium speed.

Assembling the cake:
Soak both cake layers in syrup.
Next, if you have a cake of three layers, then you can grease one layer with strawberry filling and the other with curd. And if the cake has two layers, then you can do it the way I did (see photo), using pastry bags and a large nozzle to squeeze both fillings onto the cake. Then use a pastry bag to pipe the cream into an even layer.

I’m not a big fan of sponge cakes, and in general, I’d prefer baked goods to any cake... But sometimes I’m really drawn to it... And even more drawn to create my own designer cake. Victoria cake is just like that. Queen Victoria sponge cake, delicate cream cheese cream, a layer of strawberry cheesecake, layers of strawberry marmalade, mousse decoration and, of course, fresh strawberries - this is all my new cake. Want to try?:) 
Ingredients
For the Queen Victoria sponge cake:
- butter - 250 g
- sugar - 250 g
- flour - 250 g
- baking powder - 8 g
- eggs - 4 pcs.
- zest of 1 lemon
For the strawberry cheesecake:
- curd cheese (Philadelphia, Hochland, Almette, Violette, etc.) - 250 g
- sugar - 94 g
- corn starch - 9 g
- chicken egg - 1/2 pcs
- cream 33-35% - 43 g
- strawberry puree – 65 g
For the strawberry marmalade:
- strawberry puree 380 g
- agar-agar - 3.2 g
- sugar - 100 g
For the syrup for soaking the cakes:
- sugar 50 g
- water 50 g
- juice of 1 lemon
I used the syrup left over after cooking. He's just perfect here
For the butter-curd cream:
- curd cheese - 600 g (ideally - Hochland or Almette)
- cream 33-35% - 120 g
- powdered sugar - 85 g.
This amount of cream is exactly enough to make a cake in the “Rustic” style (as in my photo, that is, the sides are only greased with cream). If you want a thicker creamy layer, increase the amount by 1.5 times.
For decoration, I specially made mousse figures covered with mirror glaze. The mousse is yoghurt. Yogurt mousse recipe. Of course, you can decorate the cake the way you want.

Preparation
This cake takes at least 2, preferably 3 days to prepare. On the 1st day you need to bake a sponge cake, cheesecake and make marmalade. On day 2 you need to prepare the cream, boil the syrup, assemble and decorate the cake. It is advisable (but not necessary) to give the cake time to soak. At least 3-5 hours.
DAY 1
- First of all, let's prepare Queen Victoria sponge cake. Preheat the oven to 190 degrees. Combine room temperature butter and sugar in a mixer bowl.

- I kneaded the dough in a stand mixer using a paddle attachment with a flexible edge. If you have a hand mixer, beat with whisks. So, beat the butter and sugar for 5-7 minutes. It should noticeably turn white and increase in volume. The sugar will not dissolve completely - this is normal.

- Then we begin to introduce the eggs. One by one. It is important. And after each egg, beat the mixture very thoroughly for at least 5 minutes.

- Combine the flour with baking powder, mix with a whisk and begin adding to the dough in parts, sifting through a sieve

- While the dough is mixing, wash the lemon and remove the zest from it. Add to the dough

- Finally knead the dough - it will be quite thick (essentially it’s a cake dough)

- Grease baking pans (I have two detachable ones, 18 cm in diameter) with a small amount of cold butter, sprinkle with flour, distribute, shake off excess (“French shirt”). Place 1/2 of the dough in each mold. If there is only one mold, then bake gradually - first one cake (cool the mold), then the second. I bake both cakes at the same time

- You need to bake for 30-35 minutes. It is important not to dry out this biscuit. As soon as it starts to turn golden, check the readiness with a dry toothpick test every 5 minutes. It comes out dry - take it out. The beauty of this sponge cake is that it almost never forms a dome. Place the biscuit pan on a wire rack and cool for 5-10 minutes.

- Then we turn the mold with the biscuit over - it should literally jump out of the mold (if you didn’t forget to make a “French shirt”). Cool it without the mold also on a wire rack. Until completely cooled. Then wrap in film and place in the refrigerator for at least 3 hours

- Let's cook strawberry cheesecake. You will also need an 18 cm springform pan. Keep in mind that since we are only preparing the cheesecake layer, it will be difficult to remove a perfectly smooth cheesecake from the pan. Use only a springform pan and preferably a high-quality one. Even if the “crust” of the cheesecake breaks, it’s okay, it will go inside the cake and these flaws will be completely unnoticeable.
- Preheat the oven to 170 degrees.
- First you need to defrost the strawberries, do not drain the juice. Some of the strawberries will go into our cheesecake, and some will go into marmalade. In total you need 450 g of strawberries

- Puree the strawberries in a blender until pureed

- Place cottage cheese (the most ideal option is Philadelphia, of course, I used Almette), sugar and starch in a mixer bowl. It is important to take corn starch and no other starch. Mix all ingredients at low mixer speed. Do not beat!

- Add half the egg and mix again until combined.

- Add cream and stir

- You need to mix just enough so that the end result is a completely smooth, homogeneous glossy mass. Add strawberry puree to it. Stir

- Cheesecake mixture is ready

- Before baking, you need to prepare a baking dish. To do this, carefully wrap the springform pan with several layers of thick foil. We don’t lubricate the mold with anything, we pour all our mass into it. Place the pan with the cheesecake in a larger diameter refractory pan and fill it with boiling water so that its level reaches at least 1/2 the level of the cheesecake. Bake for about 1 hour. It may take a little longer. How to determine the readiness of cheesecake? The edges have already set, and the middle is shaking. Don't be afraid to check it after an hour of baking. Cool the finished cheesecake on a wire rack until completely cooled and place it in the refrigerator overnight directly in the pan (the foil can be removed).

- Let's cook strawberry marmalade. The photo shows that my layer of marmalade is very thin - literally 3-4 mm. I poured it onto a silicone baking sheet and then cut out circles of the required diameter using cutouts. I advise you to cover the rings with a diameter of 18 cm with cling film and pour the marmalade directly into them - this way the layer will be thicker and there will be less waste.
- In step 13 we prepared strawberry puree. 65 g went into the cheesecake, another 380 g will be needed for the marmalade.
- Place the saucepan with the puree on the stove and bring to a boil. Mix sugar with agar and pour in a thin stream into the boiling puree. Cook, stirring with a whisk, 2 minutes

- Next, pour the still hot marmalade either onto a silicone baking sheet or (best of all) into 18 cm metal rings covered with cling film. After about an hour, the marmalade should harden. To stabilize, place the marmalade in the refrigerator overnight

DAY 2
- Let's cook syrup for impregnation. I recommend soaking the cakes, this will make them even richer. As I said above, I used ready-made syrup left over after cooking. If you don’t have it, then simply combine sugar, water and lemon juice in a saucepan and bring to a boil. Cool the syrup

- Cooking cream cheese cream. It is much lighter than my favorite cream (cheese + butter), and this cream has an amazing white color.
- Whip very cold cream until stiff peaks form.

- Combine the cream cheese, whipped cream and powdered sugar and beat very thoroughly. The cream is ready!

- Assembling the cake. To do this, cut both cakes in half - you get 4 identical cakes

- Place the first cake layer on the base and brush it with a silicone brush with a small amount of syrup.

- Next, we pipe the cream in a spiral (I have a round nozzle 5 mm in diameter).

- Using an 18 cm piece of marmalade, cut out two identical marmalade “cakes”

- Place the first marmalade layer on top of the cream

- Place the cream on it again in a spiral, and place the second cake layer on it.

- Place a layer of cheesecake on top. It still broke a little for me - no big deal :)

- Next again cake-syrup-cream-marmalade-cream

- Place the last fourth layer on top

- Coat the cake with cream and smooth it out. Place the cake in the refrigerator (preferably overnight)

DAY 3
Cake decoration
There are no limits here - only your creativity and spirit. I wanted to decorate the cake with mousse figures in a mirror glaze (mousse recipe), fresh strawberries and mint leaves. For a simpler (but no less impressive) decoration, you can leave a small amount of cream and decorate the cake with it. Fresh flowers will be beautiful. Berries. Whatever you want!
Enjoy your tea! 
Articles on the topic