Fried peppers with cheese. Pearls of Bulgarian cuisine – baked peppers, “Chushka burek”, “Palneni Chushki” Super recipe from Bulgaria Chushka baked
Natalya Glukhova
Super recipe from Bulgaria chushka pecheni
10/02 2018
Hello friends!
It's the end of summer, and now it's time to cook chushki pechena. We will bake sweet paprika in the oven. In the meantime, I’ll tell you about the original salad, how it’s prepared and what you need for it.
Such equipment cannot be found in our homeland; it must be purchased. Among other things, this is a great summer salad. And also - baked paprika can be frozen for the winter, it will not lose its taste and smell. A bright and fragrant memory of summer.
From this article you will learn:
Turn on the stove at 200 degrees, and let's begin...
While the oven is heating up, choose paprika. I'll make one batch for lunch, but you can make a lot of paprika at once. By the way, we call this “bell pepper,” but the Bulgarians call it paprika or chushka.
Choose:
- hard peppers;
- no cracks;
- bruises;
- not watery.
They need to be washed, but without fanaticism - we do not cut off the top and tail. Now we wipe our peppers with a paper towel.
Don't put wet ones in the oven! Otherwise, the skin will burn very quickly, the juice will leak out and it won’t turn out very tasty.
You can bake on a thin baking sheet, but I'm lazy - I don't want to wash off the caked juice later. Although, it is easy to clean if the baking sheet is immediately filled with water. I'll cover the pie pan well with foil - it's small, the walls are thin. For a large number of peppers, of course, you will need a baking sheet. If you are in Bulgaria, then you need to know this recipe!
Oven. Now you have to wait about 20 minutes until the paprika is baked on one side. The best indicator that it’s time to turn it over is when the skins swell and begin to separate.
Now let's turn it over. I lightly lift it by the tail - it’s not hot. You can help yourself with a spatula or fork, but this risks damaging the skin.
You will have to turn it over several times. There will be a lot of juice - that's good!
While the paprika is baking, I’ll tell you about the authentic recipe...
Paprika is baked in autumn
Classic - somewhere in the village the whole family gathers, aunts, grandmothers, godmothers...
This is how they bake paprika in the villages
And everyone bakes paprika on grates. Lots and lots of paprika! 20-30 kilograms, or even 50. Why is this needed:
Baked paprika is the basis for preparing winter preparations. Ajvar and lyutenitsa, pinjur are prepared from it.
This is, as I say, pepper jam. In addition to the peppers themselves, tomatoes, eggplants, onions, hot paprika, and garlic are also added.
All these are salads, a side dish for meat. What we call vegetable caviar. Ajvar contains more red sweet paprika and little eggplant.
Aivar, lyutenitsa
For pinjur, on the contrary - more eggplants and tomatoes.
Lyutenitsa is a hot, hot sauce that consists of 90% hellishly hot peppers.
Tricky dishes, cheese with eggs and herbs is placed in ready-made paprika, then all this is breaded in breadcrumbs and deep-fried. It's called chushka-byurek - "paprika pie."
Plus, the pigs are simply frozen for the winter. Many people here have large home freezers for storing supplies. I really want a huge freezer so I can bake lots and lots of paprika. In general, I like to bake spicy ones more - they cook faster, and I really like spicy ones. But sweet peppers should also be given attention. On holidays, this is both a good appetizer made from sweet bell peppers and a table decoration.
Critical situation with road signs
Every Balkan knows that the best way to bake paprika is at a stop sign. You know, this octagon? So, in the surrounding villages near Belgrade there was a real disaster several years ago - the signs were simply removed during the season when vegetables were baking. Residents gave up on traffic rules and removed all stop signs.
What do Bulgarians bake with?
Just don't laugh! This thing is called "chushkopek". And this is a masterpiece of engineering. You can even sit on the balcony on a cool autumn day and do some baking.
Chushkopek
It is a cylinder for 1-3 jokes. But, in a heavy metal cylinder the temperature is high, the pigs will be ready in just 5-7 minutes. During the season they are sold in supermarkets and cost 1-2 euros. This is a home option.
And so - on grills, road signs, in ovens. Again, even at home you can gather the whole family and neighbors.
- someone is responsible for baking;
- someone grinds, cuts the finished product;
- the most experienced grandmother or aunt calculates the correct amount of vinegar and manages the process;
- someone sterilizes jars;
- the rest roll up.
Fun, right?
By the way, hot ajvar is very tasty. It seems that you can eat and eat. So, as a child, my husband ate half a jar of fresh ajvar at his aunt’s. As usual, everyone tried to dissuade him, but he did not listen. And then my stomach hurt for a couple of days. So, if you have a chushkopek and are making paprika jam, let it cool!
Let's go back to our peppers
We take out the baked peppers, let them cool, and then peel them.
By the way, if you decide to freeze it, don’t remove the skin!
When it has cooled down, we do everything in the following sequence:
- We take out the leg along with the seeds. Here, as many seeds as you can take out, there are so many. They don't spoil the taste.
- Carefully cut the pepper lengthwise and arrange it.
- Starting from the top, remove the skin. It separates easily, if you baked it well there should be no problems.
So, we throw away the scalps; we won’t need them. If suddenly you were unable to remove all the skin, it’s not a problem.
Now - whole, or strip mode - your choice. In Bulgarian restaurants they often brought me whole peeled ones, not even cut.
The aesthetics of baked ingots are diverse...
Now you have a choice - season with vegetable oil, sprinkle with parsley and garlic - you can eat right away. Another option is to marinate in the cold for 1 day. Restaurants most often serve unmarinated pepper salad. This way you bake faster, cool it, and feed your guests.
If you go to Bulgaria, be sure to look for good things!
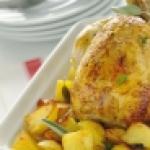
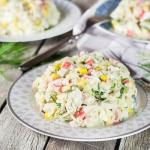
Stuffed peppers At the end of summer, the whole of Bulgaria smells like peppers. This smell is haunting, it is impossible to hide from it: in any house there is a chushkopek, and where this masterpiece of engineering is not there, peppers are baked on the grill or in the oven. Roasted peppers are the basis of many Bulgarian dishes. It is eaten simply, sprinkled with oil and vinegar and flavored with garlic, it is stuffed, it is used to make “chushka burek”, it is added to salads, it is poured with marinade and stored for the winter... In general, Bulgarian cuisine is unthinkable without it. No matter what Russian journalists say, they claim that they stopped growing peppers in Bulgaria after joining the EU, and in August the markets are full of these fragrant fruits.
How to bake peppers
Every self-respecting Bulgarian has in their home a simple device with the funny name “chushkopek”. This masterpiece of engineering is a heavy cylinder with a cylindrical hole inside. A raw pepper is put in there (and in some models - three peppers), and after a couple of minutes the baked pepper is pulled out. Chushkopeki are inexpensive, they are sold everywhere during the season, and even at a discount. For example, right now there is a special promotion - chushkopeks for 28 levs, it seems.
In principle, you can do without this device. Chushki (that is, peppers) are perfectly baked both on a wire rack in the oven and on the grill. The main thing is to increase the temperature and place some kind of baking tray underneath to catch the flowing juice.
In order for the skin to be easily removed from baked peppers, they must be put in a bag and let them “sweat.” In our opinion, the most delicious variety of pepper (of the many Bulgarian varieties) is Kapia. Red large, almost flat (this is especially important for preparing “chushka burek”) pods with fleshy pulp and a strong aroma.
So, the pods need to be washed and placed on a wire rack. And before that, it’s best to clean it - that is, cut off the tails and remove the seeds. But, in principle, this can be done later, it’s just less convenient. That's all. Now they need to be put under the grill until the skin begins to blacken.
Now it is better to remove the rough skin. To do this, hot peppers are placed in a plastic bag and tied. Once cooled, the skin will peel off easily.
What to do with roasted peppers?
Anything! It can be frozen. It can be put into jars, filled with marinade and sealed for the winter. But the best thing to do is eat it. There are many options:
- - cut into strips, salt, season with garlic, herbs and vegetable oil (you can add vinegar);
- — it’s even tastier to use grated cheese instead of salt;
- - add to any fresh vegetable salad (for example, to the Shopska salad, which we wrote about in);
- - stuff and bake;
- — prepare “chushka burek” — an ideal Bulgarian appetizer.
Perhaps it’s worth talking about the last two options in more detail.
Pilneni ingots
Filling for peppers: siren, egg, herbs, garlic. This name, funny for a Russian-speaking person, simply means stuffed peppers. In Bulgaria, what is most often used as minced meat is not meat and rice, but cheese. Although there are also stuffed peppers with meat. But with feta cheese it turns out an incredibly tasty dish.
The recipe for “pilneni ingots” (“pylenni ingots”) is very simple. You can stuff raw peppers, or you can bake them. The second option is more gentle because the skin of the peppers is removed. But the decision is up to the cook.
The filling is easy to prepare. You need to grate the Bulgarian cheese (or you can buy it already crushed - it’s called “grated siren”). Peppers before baking. A little more and there will be a delicious lunch. Brynza should be of high quality, tasty and tender. Add a raw egg and a little crushed garlic to the cheese. Add greens if desired. Some people add pieces of multi-colored peppers or tomatoes to the filling - it also turns out delicious. We once added chopped sun-dried tomato and it turned out fabulous. But even in the basic configuration this filling is very good. Its consistency should not be too liquid, so you should add eggs one at a time. Ready stuffed pepper. A dietary, low-fat, tasty and satisfying dish. By the way, this filling can be used for hot sandwiches and as a spread on bread (for those who are not afraid of raw eggs).
Now the peppers are filled with filling. If you use pre-baked peppers, you need to fill them carefully; they may tear. Raw peppers are not afraid of anything.
Well, now all that remains is to put the peppers in a greased form and put them in the oven. If the peppers are raw, then for 20-30 minutes. If baked, then 15 minutes will be enough.
The dish turns out to be tender, dietary, but at the same time satisfying, excellent both hot and cold. And very, very tasty.
Pig burek
Stuffed peppers fried in flour breading - amazingly delicious! The name of this Bulgarian specialty can be translated as “pepper pie”. Well, yes, there is a pie, only instead of dough there is sweetish and aromatic pepper pulp. So, pig burek: recipe and photo.
Raw peppers are not suitable for this dish - only baked ones. Moreover, you need to choose the flattest pods possible. They are sparingly filled with cheese, egg and garlic filling. After this, the pepper is breaded in flour, egg and breadcrumbs, and then quickly fried in oil until golden brown.
Chushka burek is especially good when served hot. By the way, we usually deviate from the canonical recipe, limiting ourselves to flour breading. But this is a matter of taste.
The dish turns out simply magical. Salty cheese, hot garlic and sweet pepper generally combine wonderfully with each other. The food turns out nourishing and tasty. In Bulgarian restaurants, it is in the “snacks” section of the menu, but with a couple of these peppers you can fill up perfectly – no worse than meat chops. Of course, preparation takes some time, but the result is worth it.
Fried peppers with cheese, prepared according to various recipes, are found in almost all national cuisines of the Balkans and the Mediterranean region. For example, in Bulgaria a very popular dish is chushka burek, a real masterpiece of Bulgarian cuisine.
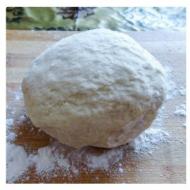
At its core, the Chushka Byurek dish is nothing more than bell pepper stuffed with a mixture of feta cheese, tomato and herbs, generously seasoned with aromatic spices, primarily savory (chubritsa). Then the pepper is dipped in a dough of a special recipe, or simply covered with breading. And fried in oil.
The term burek, burek (Turkish Burek) is a pastry, dough. This term has a very wide application in relation to dough products. But, most often, this term is borrowed from Turkish, and means baking from a special dough. For example, in Bulgaria, burek is usually called a banitsa made from unleavened phyllo puff pastry, stuffed with cheese, fried or baked in oil.
Fried peppers with feta cheese in dough or breading are very tasty. An excellent snack. However, it may well serve as a main dish, and as a side dish.
The ease of preparation allows you to make peppers for breakfast quite often, if fresh bell peppers are in season and there is good brine cheese.
Brynza is a pickled cheese made from various types of milk. Of all the types of cheese that I tried, the most delicious was fresh sheep's milk cheese, lightly salted and with a very delicate, slightly yellow tint. The cheese must be free of cracks and inclusions; small and rare “eyes” are allowed. The consistency of the cheese is slightly brittle, but to crumble the cheese you need to try.
Roasted pepper. Step by step recipe
Ingredients (2 servings)
- Bulgarian pepper 4 things
- Cheese cheese 100 g
- Tomato 1 piece
- Dill 3-4 sprigs
- Eggs 1-2 pcs
- Savory, sunflower oil, flour, breadcrumbs, black pepper, salt taste
- Remove stems and seeds from peppers. Remove internal partitions.
- Lightly coat the skins with vegetable oil and bake the peppers in the oven or microwave until soft. Roasted bell pepper retains all the taste qualities of fresh. If you can peel off the film-like outer peel, that’s very good. If not, don't worry.
Pepper, cheese and vegetables
- Let the peppers cool.
- Prepare the cheese filling. Grate the cheese onto a fine grater.
Grate the cheese on a fine grater
- Remove leaves from dill, removing rough stems. Chop the dill very finely. Scald a ripe tomato with boiling water and remove the skin. Using a spoon, remove the seeds and chop the tomato pulp very finely with a knife. Mix grated cheese, dill and tomato pulp. Add dry savory, pepper to taste, and, if the cheese is lightly salted, add salt to taste.
Mix grated cheese, dill and tomato pulp
- If the cheese is a little dry, you can add one egg white to the mixture.
- Mix everything thoroughly with a fork until you get a homogeneous paste.
Mix everything thoroughly with a fork until you get a homogeneous paste.
- Loosely stuff the peppers with the mixture. If it leaks a little, it's not a big deal. Fried peppers with cheese should become oval and flat in cross-section so that it is convenient to fry.
Loosely stuff the peppers with the mixture.
- Pour vegetable oil into a frying pan and heat it high enough.
- Place the egg in a bowl and beat it with a fork.
- Fried peppers with cheese must be sprinkled with flour - otherwise the breading will not stick well.
Sprinkle pepper with flour
- Dip the pepper in a beaten egg and roll in breadcrumbs, or better yet, in grated stale white bread.
Dip peppers in beaten egg
- Place the fried peppers and cheese into the vegetable oil heated in a frying pan.
Place breaded peppers in vegetable oil heated in a frying pan.
- Fry the pepper on both sides until golden brown.

Wash the vegetables thoroughly and rinse the parsley.
Using the tip of a knife, carefully cut out the point where the peppers attach to the stem.


Place the prepared peppers in a baking dish, pouring (1-2 tbsp) vegetable oil. It is necessary to bake the peppers in the oven, but do not overcook them so that the flesh does not spread. It is enough to stand for 10 minutes, then turn the pepper over for another 10 minutes at a heating temperature of 180 degrees.
During this time, prepare the filling for chushka-byurek.

Coarsely grate the cheese and combine with finely chopped parsley, stir.

Place the tomato in boiling water for 60 seconds. After this procedure, easily remove the skin.

Cut the tomato into four parts, remove the seeds with a spoon, leaving only the pulp, finely chop and add to the bowl with the cheese mixture. Stir. The filling is ready.

After time has passed, place the hot peppers in a food bag and tie the edges. Leave until completely cool.

Then remove the skin from each, fill half with filling and press (as in the photo).

In a separate bowl, move the egg.
Add spices to it. Then dip each pepper first into a plate with flour, then into the egg mixture and roll in breading.

Fry each breaded pepper in heated vegetable oil in a frying pan on all sides.

Place golden and incredibly appetizing chushka burek from Bulgarian cuisine on a plate. You can serve the Bulgarian dish Chushka Byurek immediately. Bon appetit!
1. First of all, put the peppers in a mold and put them in the oven for 15 minutes at 200 degrees. The main thing here is not to overbake, otherwise the peppers will simply fall apart in your hands.
You can also fry our pigs in a dry frying pan. Then we take them out and pack them in a bag or put them in a container and close them tightly for 15 minutes.
While the peppers are baking and resting, prepare the filling - mash a pack of Bulgarian cheese with a fork, add one tomato cut into small cubes (without seeds), one egg and mix well.
You can add greens. Beat another egg with a fork for subsequent breading, prepare flour in one plate, and crackers in another (I use homemade ones, they are more “curly” and look much more beautiful).

2. The pepper has rested and now we gently but persistently remove the skin from it and clean it from the seeds. The work is not easy, as we have to try to maintain the integrity of the pig peppers. Now put the cast-iron frying pan on the fire, pour in non-aromatic vegetable oil and heat it up.
Meanwhile, fill the peppers with filling, roll in flour, then in egg and breadcrumbs. The last two procedures can be repeated. Now fry our pigs on both sides over medium heat until golden brown.

3. Here are our burek pigs and they are ready! They can be served as a hot appetizer, but they are no less tasty when served cold. I allowed myself to deviate from the classic recipe and made two peppers with our homemade cottage cheese and garlic, it turned out very tasty too! I would also like to note that Bulgarian cheese is quite salty (and as for me, it’s very salty), so we don’t add salt to anything else!
GOOD APPETITE! DELICIOUS! BON APPETIT!
Articles on the topic