Recipe for cooking cutlets in Kiev. How to cook delicious meatballs in Kiev. Lazy minced meat Kiev cutlets
Juicy and tasty cutlets in Kiev differ from traditional ones in that they are prepared not from minced meat, but from beaten chicken fillet. Biting into a tender fragrant cutlet, you find butter inside with various additives - herbs, mushrooms, boiled eggs and grated cheese. In the most “correct” cutlets, a chicken bone sticks out on the side, on which they put a papillot so as not to burn their hands. And of course, the most important thing is how to learn how to make chicken Kiev at home so that they have a crispy crust and tender juicy pulp. It is quite real and will not take much time. Let's try!
Butter filling for Kiev cutlets
First we make the filling, and then we do the meat - this is one of the cooking rules. Since the base of the filling is butter, remove it from the refrigerator and let it thaw until it becomes soft. For the filling, it is better to take very high-quality oil with 82.5% fat content: the better the oil, the more tender and tastier the cutlets.
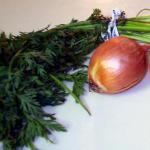
It is no coincidence that butter for the filling is called green - we need fragrant greens. Grind dill, parsley, cilantro and mix with butter, add grated hard cheese to the mass, salt and form thick sausages. It is best to do this as quickly as possible so that the butter does not start to melt. For 80 g of butter, take 8 g of cheese and a bunch of dill - from this amount of products you will get 4 sausages. Or you can just roll the pieces of butter in chopped dill. Put the green butter in the freezer and get on with the meat.
The best meat for Kyiv cutlets is chicken breast

They make cutlets from chicken fillet, that is, from chicken breast, and since the chicken has two breasts, you get two cutlets. For this reason, they are considered a delicacy, because to fry four, six, eight cutlets, you need several chickens. However, now you can easily buy chicken breast in the store, but if you want to cook a classic cutlet with a bone, you will have to buy a whole carcass. And now let's prepare the meat for the Kiev cutlet, a step-by-step recipe for this process will help you figure out how to properly cut and beat the fillet.
1. Rinse the chicken well, lay it on its back, remove the skin from the meat and make a deep cut along the keel bone, which runs vertically in the middle of the breast. Help yourself on the other side by flipping the fillet and making a cut on both sides.
2. When carving the breast, leave the wings if you plan to cook a classic chicken Kiev. From a ready-made chicken breast bought in a store, a cutlet will turn out without a bone - this is also delicious, although it looks more like a roll.
3. So, you cut out the breasts with wings, and now remove two fragments from the wings, leaving only the humerus, which is firmly attached to the sternum by tendons.
4. Clean the humerus from the meat, using a sharp knife, and remove the joints at the ends. Now future cutlets resemble a leg with a bone - that's how they should look.
5. You probably know that the composition of the chicken breast includes large and small fillets, and now you have to separate them from each other with scissors or a knife. For cooking cutlets, both parts are useful to us.
6. Wrap large and small fillets in cling film and gently beat with the flat side of the mallet until you get a cake 4-5 mm thick. If you beat the fillet with the serrated side, you will get minced meat, so it's best not to try. If you overdid it a little and holes appeared in a thin layer of meat, it’s not scary, you can close them with another fillet, and when you dip the cutlet in batter and fry it, the “defective” places will generally become invisible.
We make rolls, bread cutlets

The main thing is to do everything right. Wrap the butter-cheese sausage in a small roll sprinkled with salt in the form of a tight roll, salt the large fillet, place the roll in the middle and wrap again. Another way to form cutlets is that a piece of butter is laid out in the middle of a large fillet, covered with a small fillet, and then twisted into a roll, like cabbage rolls.
Try to make the product tight and dense enough to protect the oil from leakage, for this, remember the cutlet in your hands, giving it the desired shape. And now lightly moisten the surface of the fillet with water, roll in flour and remember a little more - the edges of the meat should stick together, then the cutlet will take on an appetizing look. Dip prepared foods in batter, which is made from 2 eggs beaten with 1 tbsp. l. flour and a pinch of salt, and roll in breadcrumbs. You can add a little milk to the batter - for tenderness and airiness. And now continue to work on the shape of the patty - it should be perfectly smooth, beautiful, resembling an ellipse. Then repeat the procedure with batter and breading again - double breading does not allow the oil to leak out and creates a crispy golden crust, which is an attribute of Kiev cutlets.
How to fry chicken Kiev

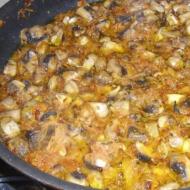
Lightly blot the pieces with a paper towel to remove excess moisture, otherwise the oil will sizzle and splatter. Fry the cutlets in a large amount of hot vegetable oil, brought to a boiling point - bubbles must appear in it. You can fry in a deep fryer or in a pan - until a beautiful golden color, which will take about 3 minutes on each side. It is not recommended to fry longer, otherwise the rolls will burn easily - you still have to bring the Kiev cutlets to readiness in the oven.
So, after frying in a pan, cover a baking sheet with baking paper, put meat rolls on it and bake for 15 minutes in an oven preheated to 180-200 ° C. The readiness of the cutlets is easy to check - carefully cut them, if juice starts to flow from the pulp, the dish is ready!
And one more subtlety - before serving the cutlets on the table, pierce them with a fork so that the steam comes out, otherwise hot oil will squirt out of them when biting. Chicken Kiev can be served with baked vegetables, mushrooms, crumbly rice or potatoes. It's extraordinarily delicious!
Five secrets of cooking Kiev cutlets

Secret 1. Cut the chicken fillet only from the thickened edge - this way the process will go faster and you will not cut through it.
Secret 2. If you remove the tendons from the fillet, the cutlets will turn out more tender and softer. Some cooks recommend cutting them a little in several places so that the cutlets do not shrink when frying.
Secret 3. Add some spices and dried herbs to the breadcrumbs, and Kiev cutlets will delight you with new tastes and aromas.
Secret 4. Wrap the cutlets in cling film and put them in the freezer for 10 minutes before breading. In this case, the oil will harden and will not flow out during the "sculpting" process. Some housewives put cutlets for 10 minutes in the freezer and after breading.
Secret 5. If you do not have time, and the guests are already on the doorstep, you can simplify using minced chicken. Make a minced meat cake, put the butter filling inside, and then wrap the cutlet with a roll.
Pork Kiev cutlet

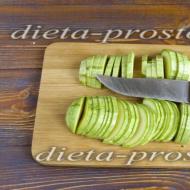
This, of course, is not a classic, but it is also very tasty. Take 400 g of pork tenderloin or any part of the carcass without fat and fat. Make a filling with 100 g of softened butter, 2 cloves of minced garlic, a finely chopped bunch of parsley and dill, a pinch of salt. Put the butter on cling film, form sausages and put in the freezer.
Cut the meat into layers about 0.5-0.7 cm thick, beat with a hammer, but carefully so as not to tear it. Rub the meat with salt and pepper, make a batter of 2 eggs, salt and spices, beat well and remove the butter sausage from the freezer. Cut it into pieces, put on meat cakes and twist them into tight rolls. Roll cutlets in flour, dip in eggs, and then in breadcrumbs mixed with spices for meat. Double or triple breading and fry the patties in oil, making sure they float in it. Heat the oil, and then reduce the heat to a minimum and fry the cutlets for 3 minutes on each side. You can let the cutlets bake in the oven or serve them immediately with a fragrant side dish!
Chicken Kiev: Mexican Recipe

This dish is great for winter, because its spicy heat pleasantly warms and does not freeze. For the filling, mix 5 tbsp. l. butter, 3 tbsp. l. hard cheese cubes, 2 tbsp. l. finely chopped canned chili peppers, 2 tsp. dried onion and ½ tsp. salt. Roll into balls and freeze them.
As a breading, Latin American gourmets use crushed crackers - you will need 1 cup of cheese crackers and 1½ tsp. taco seasonings. It contains paprika, oregano, cumin, chili, cayenne, garlic, dried onion and basil, so you can make your own.
Gently beat 6 chicken breasts, approximately 160-170 g, with a hammer. Put a ball of butter on each chicken tortilla, roll, dip in melted butter, roll in cracker breading and secure the rolls with toothpicks. Put them in a microwave-safe dish and bake for 15 minutes on high power, and then remove the toothpicks. The inhabitants of Latin America do not claim to be the author of Kiev cutlets, but they treat this dish very reverently.
Any sauce can be prepared for cutlets - mushroom, milk, cheese, tomato, garlic, vegetable, fruit and berry. The taste of cutlets will improve, and the dish will look very bright, original and spectacular, and loved ones will certainly express admiration for your culinary skills!
Kiev cutlets are among those dishes that many people are afraid to cook. After all, the process includes many nuances that must be taken into account and strictly adhere to certain rules.
There is a classic recipe for cooking Kiev cutlets, which allows you to make a real popular dish. But often it is supplemented with other ingredients that add piquancy and originality to the dish.
Cheese is most often used for these purposes. To facilitate the cooking process, the chicken fillet is replaced with minced meat. Let's take a closer look at some of the recipes.
What is this dish - cutlet in Kiev?
The classic chicken Kiev cutlet belongs to the varieties of cutlets, the main part of which consists of fresh chicken fillet, pre-beaten. Butter is wrapped in the prepared meat. You can also drive this ingredient into the meat with a kitchen hammer and so the taste of the future dish will turn out to be rich creamy.
The shape of the patty resembles an elongated ellipse. The formed cutlet is soaked in a beaten egg and rolled in breadcrumbs. The preparation of a real Kiev cutlet is deep-fried.
Classic recipe
In order to cook real Kiev cutlets, you will need:
- whole chicken;
- two garlic cloves;
- two branches of tarragon;
- butter (unsalted) in the amount of 100 grams;
- parsley, pre-chopped - three tablespoons;
- half of one lemon;
- wheat flour in the amount of 100 grams;
- four fresh chicken eggs;
- chopped breadcrumbs - 200 grams;
- vegetable oil as needed;
- salt and pepper according to personal preference.
Cooking time - 2 hours 30 minutes.

Calorie content - 290.7 kcal.
The process of cooking cutlets in Kiev:


Chicken Kiev recipe with cheese
These cutlets are rich in creamy cheese flavor. Such a dish is worth preparing and delighting loved ones.
List of required components:
- chicken fillet in the amount of 700 grams;
- ground black pepper and salt according to personal preference;
- butter (unsalted) - 45 grams;
- semi-hard cheese - about 100 grams;
- a small bunch of fresh parsley;
- a full glass of wheat flour;
- two full glasses of breadcrumbs;
- two fresh chicken eggs;
- a glass of milk;
- vegetable oil with a volume of 800 ml.
Cooking time - 1 hour 45 minutes.

Calorie content - 301 kcal.
Stages of preparation:

Cutlet in Kiev with a bone at home
In this recipe, it is very important to properly cut the chicken, so you need to be careful and accurate. For cooking you will need:
- two chicken breasts;
- three tablespoons of flour;
- a small bunch of fresh parsley and dill;
- two fresh chicken eggs;
- breadcrumbs - quantity as needed;
- butter (unsalted) in the amount of 70 grams;
- small lemon;
- vegetable oil - one glass;
- spices, spices, ground black pepper, salt according to personal preferences.
Cooking time - 1 hour 50 minutes.

Calorie content - 298.3 kcal.
Detailed cooking:


Minced chicken Kiev: a step by step recipe
Minced meat patties are much easier to prepare than whole meat patties. Therefore, for beginner cooks, you can try, first of all, to cook this simplified version. For this you need to prepare:
- chicken fillet - about ½ kg;
- butter - from 60 to 80 grams;
- two fresh chicken eggs;
- flour and breadcrumbs from white bread - the amount depends on the number of future cutlets;
- vegetable oil - from 300 to 500 ml.
Cooking time - 1 hour.
Calorie content - 273 kcal.
Cooking step by step:

There are certain rules for serving Kiev cutlets to the table:
- A small crouton is laid out on a plate, made from wheat bread or puff pastry;
- A cooked Kiev cutlet is placed on top;
- Pour the cutlet on top with melted butter;
- A papillot made of a paper napkin is put on a free bone;
- Near the crouton with a cutlet, there must be a tartlet filled with milk sauce with green peas;
- Nearby you can lay out french fries, cauliflower.

And finally, some useful tips that you should pay attention to in the cooking process:
- When cutting chicken fillet, you should use only a very sharp knife, because otherwise you can spoil the meat, which will begin to tear during cooking;
- For butter filling, it is worth using additionally dried dill, since only it can give the dish a unique taste and aroma;
- In order for the cutlets not to lose their original shape, it is worth holding them in the freezer for ten minutes before cooking. But before that, be sure to wrap the workpiece in cling film;
- Cutlets should be dipped in oil only after it begins to boil.
Chicken Kiev is a dish served in many restaurants. Making it at home is not easy. It will require care, accuracy and precision. But do not be afraid, because if you do not try, then nothing will work out for sure.
And in addition - a very detailed video recipe for cooking chicken Kiev.
To prepare cutlets in Kiev, remove the skin from chicken breasts. Lay them inside up. Cut the fillet lengthwise and flatten each piece so that the filling fits.
Cover the breasts with cling film and carefully beat off. Trim the white tendons in several places so that the patties do not shrink when frying.
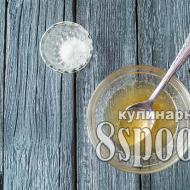
For the filling of cutlets in Kiev, chop the parsley very finely. Put it in a bowl, add butter at room temperature. Salt. Mix thoroughly until a homogeneous mass is obtained.
Using two tablespoons, form the filling of cutlets from butter with herbs. Put it in the freezer for 3-5 minutes so that the butter does not melt. Take out, put on the fillet and wrap the cutlet so that the edges are on top of each other. Place in freezer for 5 min. While the cutlets are freezing, mix the eggs with milk and beat with a whisk, as for an omelet.
Pepper cutlets and roll them in flour. Dip in egg with milk and roll in breadcrumbs. Dip again in egg and milk and roll again in breadcrumbs.
Preheat oven to 200°C. Heat the oil in a frying pan and fry the Kiev cutlets until golden brown, 5 minutes, then bring them to readiness in the oven for 10 minutes.
Compound
- Servings: 2
- chicken or chicken, weighing 1-1.2 kg,
- vegetable oil (for deep frying),
- salt,
- freshly ground pepper
- for green oil
- butter - 100 g,
- dill greens,
- salt
- for breading
- white bread (dried) or breadcrumbs - 150 g,
- flour - 50 g,
- eggs - 2 pcs,
- milk - 1 tablespoon,
- a pinch of salt
Cooking
Wash and dry the chicken. Cut off the wings at the joints, leaving the last joint that connects to the breast intact.

Separate the skin from the breast.

Make an incision along the keel bone.

Cut the fillet from the breast along with the bones from the wings.

Clean the bones from the meat.

Separate the small (inner) fillet from the large (outer) fillet.

In a small fillet, cut the tendons (so that the cutlets do not deform during frying). Make a shallow incision along the large fillet (in the place where the fillet thickens). Make cuts to the right and left, without cutting through the fillet, and open like a book.

Carefully beat the fillet (large and small) in a bag or between two layers of cling film, trying to avoid gaps.

cook green oil
. Wash the dill greens, dry and finely chop.
Combine softened butter with dill and a pinch of salt, and mix well.

Put the oil on cling film.
Roll up and put in the freezer for 15-20 minutes.

Advice. Green oil can be used in other dishes as well. A piece of this oil can be put on a baked meat or fish steak. The butter will melt and saturate the steak with a fragrant sauce. In green oil, if desired, you can add chopped clove of garlic.
Cut the frozen butter in half (for two cutlets).
Salt and pepper the chicken fillet.
Put frozen butter in the middle of a large fillet.

Cover with a small fillet. 
Wrap the butter tightly around the chicken fillet on all sides so that there are no gaps, and form an elongated cutlet.

Advice. It is important that the oil in the cutlet is carefully covered with the chicken fillet, otherwise it will leak out during frying.
For the same reason, a double breading is made for Kiev cutlets.
Prepare the second cutlet in the same way.
Wrap the patties in cling film and put in the freezer for 20 minutes.
Cut off the crusts from white bread and grind in a blender.

cook lezon
.
Break the eggs into a bowl, add a tablespoon of milk, a pinch of salt and shake the mixture with a fork or whisk.
Pour flour and breadcrumbs (or breadcrumbs) into separate bowls.

Bread cutlets in flour (shake off excess flour). 
Dip in lezon. 
Then roll in bread crumbs. 
Dip again in ice cream and roll well again in breadcrumbs (you will get a double breading). Heat vegetable oil in a saucepan or deep frying pan (up to 160°C). Carefully place the patty in the hot oil.

Advice. It is desirable that the oil completely covers the cutlet. If there is not enough oil, the cutlet, during frying, must be constantly poured from above with boiling oil (with a spoon) so that the temperature inside the cutlet does not drop, and it is evenly fried on all sides.
Fry until golden brown for 2-3 minutes on each side.

Carefully, using a slotted spoon, transfer the cutlet to the baking dish.
Place in a preheated oven at 200°C and cook for about 4-5 minutes. In the same way, prepare the second cutlet.
Tip 1. A lot of oil is consumed for deep-frying, therefore, in order not to be wasteful, after deep-fried cutlets, you can fry potatoes cut into cubes or slices in the same oil. Put the fried potatoes on a paper towel to absorb excess oil, salt and serve as a side dish to the cutlet.
Tip 2. If you do not want to use deep fat, you can fry the cutlets in a pan, in a small amount of oil, and bring to readiness in the oven.
Serve chicken Kiev with boiled rice, mashed potatoes (or french fries) and fresh vegetables.
When cutting the patty, fragrant green oil flows out of it.

Enjoy your meal!
Chicken Kiev today is found in almost every restaurant, and the hostess, who knows how to cook such a dish at home, will never end up with guests. At the same time, French, Russian, and Ukrainian chefs attribute the first recipe to themselves. At one time, chicken breast cutlets were called "de-volay", or "Mikhailovsky". Nevertheless, they were quickly forgotten about, but in the “Kiev” version, the dish still exists.
The main feature of Kiev cutlets is the addition of butter to the meat. In the original version, it was carefully driven into the chicken fillet, but later, to speed up the process, they simply began to wrap it. One way or another, this ingredient gives the dish a special softness, delicate taste and delicate aroma.
For the manufacture of the cutlets themselves, a special part of the chicken is used, cutting off the breast from it along with the wing. Next, the wing is separated, leaving only the bone. It is for her that you should keep the finished dish during the meal. For convenience, a special napkin is put on the bone - a papillot. The meat is carefully beaten off and the filling is wrapped in it. In addition to butter, it can be cheese, herbs, ham, mushrooms, etc. Also, at home, not whole fillet, but minced chicken is often used.
After the formation of cutlets, they are generously sprinkled with breadcrumbs and fried in a large amount of vegetable oil. At the end of cooking, you can shift for more uniform cooking.

Photo of classic chicken Kiev cutlets
Chicken Kiev cooked according to a traditional recipe always looks very presentable and appetizing. The most important thing is not to spoil the integrity of the dish, so you need to very carefully clean the bone and work with the fillet. Double breading perfectly preserves the oil inside the patty.
Ingredients:
- 2 chicken breasts;
- 50 g butter;
- 2 eggs;
- 2 tbsp. l. flour;
- 1 glass of vegetable oil;
- 1 lemon;
- 1 bunch of parsley;
- 2 tbsp. l. breadcrumbs;
- Salt pepper.
Cooking method:
- Separate the breast together with the wing, remove the meat after the first joint.
- Separate the large breast fillets from the small ones.
- Remove the tendons and make longitudinal cuts in both pieces to the middle.
- Soften the butter, add finely chopped greens to it.
- Squeeze in the lemon juice and season with salt to taste.
- Spread butter on foil, wrap and refrigerate.
- Beat the small fillet, rub a little with salt and pepper, put butter inside and wrap.
- Put the resulting cutlet inside a large fillet and also wrap.
- Fasten the edges with wooden sticks or toothpicks.
- Roll the cutlet in flour, then in the egg and breadcrumbs.
- Fry chicken Kiev in well-heated vegetable oil until golden brown.
Interesting from the network

Photo of cutlets in Kiev from minced chicken in the oven
Forming the right cutlet in Kiev is not such an easy task as it seems at first glance. If you use minced meat for cooking, then this process becomes easier than ever. You can add a few drops of lemon juice to the filling.
Ingredients:
- 500 g chicken fillet;
- 2 eggs;
- ½ cup milk;
- 50 g parsley;
- 50 g dill;
- 1 cup breadcrumbs;
- 100 g butter;
- 2 tbsp. l. flour;
- Salt pepper.
Cooking method:
- Pass the meat through a meat grinder.
- Add chilled milk to minced meat, a pinch of salt and pepper.
- Knead the minced meat until elastic.
- Finely chop the herbs and butter.
- Form flat cakes from minced meat (about the size of a palm), put butter and herbs in the center of each.
- Blind cutlets like pies, and leave them in the freezer for 20 minutes.
- Beat eggs, salt and pepper.
- Roll cutlets in turn in flour, egg and breadcrumbs.
- Fry cutlets on both sides in vegetable oil for 3-4 minutes.
- Transfer the cutlets to a baking sheet and cook for 15 minutes at 180 degrees.

Photo of Kiev cutlets with cheese in a slow cooker
Butter already gives the dish a special tenderness, and with hard cheese, Kiev cutlets turn into a real masterpiece. During cooking, the cheese melts and appetizingly follows from the meatballs when cut. Instead of "Baking" in certain models of the multicooker, the "Frying" mode can be used.
Ingredients:
- 300 g chicken fillet;
- 40 g butter;
- 40 g of hard cheese;
- 2 eggs;
- 100 g breadcrumbs;
- 100 g flour;
- Greens;
- Salt pepper.
Cooking method:
- Cut the fillet from the breast along with the wing.
- Separate the bone from the meat, clean it.
- Separate the upper part of the fillet from the bottom, remove the veins.
- Beat the meat to a thickness of 0.5 cm.
- Soften the butter, finely chop the greens, grate the cheese.
- Mix cheese, butter, herbs, salt and pepper.
- Allow the resulting mixture to harden in the refrigerator.
- Season the meat with salt and pepper on all sides.
- Wrap the butter in the fillet in the form of sausages.
- String sausages on the bones and put in the freezer for 5 minutes.
- Beat eggs with spices.
- Roll cutlets in flour, then in eggs and breadcrumbs.
- Dip again in egg and breadcrumbs.
- Pour a large amount of vegetable oil into the multicooker bowl.
- Fry cutlets in the “Baking” mode for 15 minutes on each side.
- Leave the dish in the “Heating” mode for 5-10 minutes.
Many may not figure out the first time how to cook chicken Kiev. Although the technology is quite simple, you need to make a similar dish at least several times for an ideal result. As for inexperienced chefs, a detailed video on how to cook Kiev cutlets at home can help them out:
Now you know how to cook chicken Kiev according to the recipe with a photo. Enjoy your meal!
Chicken Kiev is an ideal dish for lovers of tender chicken meat in all its interpretations. Juicy filling, crispy cracker crust and fragrant spices have long won the hearts of gourmets around the world. To pamper your loved ones with such a treat, you need to learn a few simple rules on how to fry Kiev cutlets at home:
- Before cooking cutlets, it is important to remove the white tendons, otherwise they will spoil the taste of the dish;
- Butter for cutlets must be frozen until completely solidified;
- If you are cooking large breast cutlets, be sure to send them to the oven for a few minutes after frying in a pan;
- It is better to bread all cutlets even before frying, so that later you will not be distracted from the cooking process;
- If during the formation of the cutlet the meat is torn, you can close the resulting hole with any other piece of fillet, having previously beaten it off;
- Oil during frying should cover the cutlets at least to the middle.
Related Articles