How to pinch potato pies beautifully on top. How to mold a pie beautifully from yeast or puff pastry
Most feasts simply cannot do without fresh hot pies. For this reason, the question of how to wrap pies is very relevant. The look of this appetizer is just as important as the great taste. Taking into account the specifics of the filling (meat, mushrooms with onions, fish, potatoes, cabbage or jam), a different form of baking is allowed.
Forms of patties: varieties
Slavic cuisine is unimaginable without fresh pastries. For a long time, more and more new tips on how to sculpt have been appearing. The main requirement for good pastries is at the same time a delicious filling, high-quality dough and the skill of a cook. Patties can be called a unique dish, as they can perform a different function on the table:
Snacks (stuffed with mushrooms, onions or vegetables);
Main course (filled with fish, meat or potatoes);
Dessert (with cottage cheese or jam filling).
In order for baking to have a pleasant appearance, a number of certain rules must be observed. In order for the dough not to stick to your hands, you need to grease your palms with sunflower oil. In order for the edges of the pies to be well fastened, you can lightly coat them with egg white or water. Before frying or baking the pies, leave them at room temperature for 15 minutes, covered with oiled plastic wrap. This will allow the dough to become fluffy and soft. In order for a golden crust to form on top of the baking, you should grease the products with egg yolk.

How to cook pies correctly?
To make pies not only tasty, but also attractive, it is important to follow the technique of their preparation. The shape of the product may also depend on what type of filling you prefer. The cooking process begins with kneading the dough. To make yeast pies, you will need eggs, yeast, milk, sugar, salt, flour and the chosen filling. The amount of filler in the finished baking will be determined by the size of the products. When the dough is rolled out, it must be divided into equal parts. If you do not follow this rule, the pies will not be the same size. The size of the test pieces is also important. If you make them too big, they will not look very nice, and it will be inconvenient to eat them.
The originality of this product depends not only on the huge number of fillers, but also on the various forms available. Cake modeling techniques include several types available - round, square, oval, triangular.
The connection between the filling and the shape of the products is expressed as follows. If you use fish, meat or vegetables, it is better to make pies closed. This will keep the filling juicy. Jam, cottage cheese and other similar fillings can be used in

Round pies
These cookies evoke nostalgic memories of childhood. Round-shaped pies are usually made with fruit fillings, more often with apples. This is due to the ability to keep the melted juice inside the products.
In order to make beautiful round pies, you should roll out small cakes from the dough. Their thickness should be no more than 5 mm. The filler is laid out in the center, and the edges are folded towards the middle. Then the edges must be fixed, giving them the shape of a bag. On a baking sheet, such pies are laid out with a clamp down to avoid their unfolding in the oven.
In addition, if you intend to bake products, and not fry, you can make pouches with an open top. To do this, the dough is rolled into a thin layer, then even circles are cut out on it using a glass or cup. Approximately one tablespoon of filling is applied to the center of each circle, and then the edges are tucked up and glued together, while a small hole remains at the top. Such pies can be made with any filling that does not spread.

Oval-shaped pies
The most popular type of yeast dough pies is an oval shape. They can be made with sweet fillings, as well as with cabbage, liver, onions and eggs, and so on. To make such pastries, the dough must be divided into pieces, each of which should be rolled into a roll. These rolls must be cut into small pieces (about 4 cm each), then each of them is rolled into a thin oval-shaped cake. The filler is placed in the center. After that, one edge of the cake is superimposed on the other, after which the dough should be molded so that the product resembles a semicircle. On a baking sheet or pan, such pies are laid out with a seam down. Such forms of pies can also have their own varieties.
In addition, if you intend to fry, you can fold the edges of the dough into a crescent and fasten well along the edge. You will get a pie that resembles a cheburek in shape.

Triangular pies
Such pastries most often have an open filling. The filler is often potatoes, chicken fillet, meat or fish. Triangular pies are made as follows: you need to roll out a thin (not thicker than 0.5 cm) rectangle from the dough. The filler is folded in the middle, after which the edges of the dough overlap each other obliquely and are well fixed. In this case, the seam can be either tucked up or made in the form of a pigtail.
Square shaped pies
To make square-shaped pastries, you need to roll out the dough with a rolling pin into a thin layer and then cut into identical rectangular fragments. The filling is laid out in the middle, after which the dough is folded like a postal envelope. To do this, you need to blind two edges diagonally at an angle of about 45 degrees. Fasten the remaining 2 edges in the same way. Lastly, the center is closed, and the seams are glued together in the form of dense bundles. These can be made not only with yeast pies, but also products from different types of puff pastry.

How beautiful to wrap products?
Regardless of the shape of the blanks, the issue of proper bonding of the edges is of great importance. How to wrap pies beautifully? There are several common ways. When sculpting the seams, it is necessary to exert some effort so that the fastened edges do not diverge during baking or frying.
The first way is that the filling is laid out on the workpiece from one edge in the form of a sausage. The product is wrapped on the same side to form a rolled tube. Thus, you will get a beautiful oval-shaped pie with neat, even edges. A rectangular product folded in an envelope can also be closed up in different ways. You can make a large seam, which will subsequently be folded down and pressed by the weight of the product, but it is also possible to make it in a beautiful design. There are also options with a partially open top of the pie, but in this case it must be taken into account that the filling does not fall out during frying or baking.
How to wrap pies with an original seam?
There are several types of baking designs.
To make a pigtail seam, hold the workpiece with your left hand, and use your right thumb to twist the edges so that a twisted rope forms. At the edges of the product, extra tips are formed, which should be pinched off.
To make a seam with a hedgehog, fasten the edges of the dough so as to form small triangles. You can also make cuts along the entire edge at a distance of about one centimeter from each other and fold each piece diagonally.

Embossed pies
How to sculpt pies from yeast dough in a relief form? This is a slightly more complex form of baking. Such pies can be a good decoration for the festive table. You can use any filler - both sweet and salty. The main thing is that the filling does not spread. How to wrap pies of this type? To do this, the dough should be rolled out with a layer and cut out of it into oval-shaped pieces. In the center of each of them with a sausage, you need to spread the filler. The lower and upper parts of the dough are tucked in by about a quarter. The corners of the workpiece are fastened crosswise from the side of the wide edge (this is similar to swaddling).
Calories: Not specified
Cooking time: Not indicated
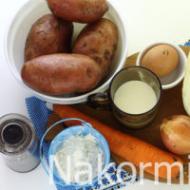
Required products:
- yeast dough,
- stuffing for pies.
How to cook with a photo step by step
1. Divide the finished yeast dough into portions. Roll into balls the size of a chicken egg. To form a pie, roll the ball into a round cake, 12-15 cm in diameter. Place the desired filling in the center of the blank. 
2. Bend the top edge of the cake inward (as in the photo). 
3. On the right side, bend the edge of the workpiece, covering the filling. 
4. In the same way, bend the left edge of the cake. 
5. Alternately bending the edges to the center, “braid” the seam with a pigtail. The filling will be inside, and the seam will turn out neat. 
6. There is another type of seam fastening with a “pigtail”. To do this, also roll out a ball of yeast dough into a round cake. Distribute the filling in the central part with a strip. 
7. Bend the workpiece in half and fasten the junction with light movements. 
8. Next, proceed to the "weaving": slightly stretch the edge and bend it with an angle. 
9. Then pull the edge a little again and bend it inside out. 
10. Similarly, “braid” the pigtail to the end, around the entire perimeter. Only at first this process seems impossible, but over time, weaving turns out to be very exciting. By the way, in this way you can sculpt dumplings. They turn out very pretty. 
11. The easiest method for making pies that even a child can handle: roll out a ball of dough into a round cake. Lay the filling in the central part of the workpiece. 
12. Connect the edges of the cake in the central part, forming an oblong pie. To make the fastening strong, try to press the edges to each other as tightly as possible. These pies can be baked either seam up or seam down. I also suggest you cook very tasty and satisfying. 
13. Bake pies until golden brown and enjoy fresh and beautiful pastries.
How beautiful to make pies? 4 cooking methods with photo
Filling
Chop the onion with a knife or scissors (I like to do this). Sprinkle generously with salt and knead until juice appears.
Boil the egg on the stove for 10 minutes. As soon as it is cooked, put the pan under cold water and clean it after a couple of minutes. Cut it into cubes and mix with green onions. Let's try salt.
Method "Accordion"
Let me remind you that the finished dough should not stick to your hands! Sprinkle flour on the table. Cut the dough into small balls, roll into even balls.
With the help of a rolling pin, we make a small "cake" of an oval shape. Put the stuffing on one side.
With a sharp knife, cut the other part into thin strips.
We turn the pie, pinch each ribbon of dough.
We set the finished product to be upset for 15 minutes.
We grease our beauties with yolk, put them on parchment or baking paper, and send them to an oven preheated to 180 degrees for 30 minutes.
Toward the end of baking, increase the temperature to quickly form a golden crust (see the rules for baking in a gas oven). Lubricate the finished pies with vegetable oil.
Classic beautiful way
From the ball we roll a round cake, put the filling in the center.
We close the tip of the pie, connect it to one end of the dough, and then to the other.
It is very difficult to show in the photo, so watch the following video:
Lubricate the surface with yolk, put on a baking sheet and bake (everything is as in the previous recipe).
The finished cake should be perfect in every detail - from the color of the crust and the degree of doneness to how the edges are pinched. Moreover, the last factor is quite important. And often it is with him that many questions arise, because the beautiful design of the edges of the pie is a whole art.
The correct pinching of the edges of the cake belongs to the category of baker's sculpture. Therefore, it is necessary to approach such a procedure very carefully and responsibly.
How to pinch an open pie
In the case of an open cake, the correct pinching of the edges is more important than in any other case. After all, it is they who finally form the image of a whole confectionery product. Experts recommend moistening the edges of the cake a little first to make them more pliable. In the process of processing the edges, it is necessary to moisten your hands so that the dough does not stick to them.
A beautiful way to pinch the edges of an open cake is to decorate with a fork. The edge of the dough should be trimmed around the edge of the pan in which the cake will be baked. Then take a fork and gently but vigorously walk along the edge, pressing the dough into the form.
If, under pressure, the fork starts to stick to the dough and pull it out with it, gently dust both the dough and the fork with flour
You can close the edges of the cake with a spoon. To do this, you need to walk along the edge with its rounded part. To make the edges more artistic, use several spoons of different diameters.
Alternatively, you can wrap the edges of the pies beautifully by creating a wavy edge. To do this, carefully cut the dough with special confectionery scissors so that about 1.5 cm remains evenly above the form. Then bend the edges down and gently walk in a circle on both sides with your fingers, creating a wavy edge.
A very popular way to pinch the edges of an open cake is to use a pigtail. It is made from leftover dough. Here you need to make a detailed calculation. Take the rest of the dough and roll thin sausages out of them. Weave them together, attach them to the edge of the pie and lightly press them against the pie with your fingers.
Prepare the mount for the pigtail. For this you need an egg yolk. Beat it well and grease the edge of the pie and the pigtail itself. Then gently press the pigtail to the edge of the pie
How to pinch a closed pie
Despite the fact that it is much easier to close a closed cake, it is desirable that its edges are also decorated artistically. The classic way to pinch pie dough is to simply close the edge with your fingers. After the edges are securely connected, gently pat them down so that the line is not so pronounced.
You can enhance the effect and after you align the edges, correct them with a fork. So they will become more corrugated and beautiful.
Alternatively, you can lift the edges up, pinch like dumplings and carefully place along the edge of the top of the pie. Get the original pigtail.
What holiday is complete without cheesecakes, buns and pies? It is by them that the culinary skills of the hostess are often evaluated. Here you can and should not only show your imagination in choosing the filling, but also demonstrate your aesthetic taste, paying attention to the shape. Therefore, the question of how to sculpt pies so that they look appetizing always remains relevant.
Pies are everything!
The history of Slavic cooking is unthinkable without pies. Their recipes are passed down from mother to daughter and granddaughter from century to century. Over their long history, pies have been enriched with hundreds of recipes, dozens of fillings and a decent number of cooking methods. But the main secret of delicious pies is still the principle of combining good dough, delicious filling and patience.
Pies are a very convenient dish. Depending on which filling you choose, they can be:
- appetizer (vegetable, mushroom fillings);
- main course (pies with meat or fish);
- dessert (sweet or dairy fillings).
But it's not just homemade food. Many large domestic and foreign restaurants offer a large selection of pies on the menu. The uniqueness of these flour products is associated not only with the variety of fillings, but also with the type of dough and shape. As for the test, it can be:
- yeast (butter, for fried pies);
- yeast-free (puff, custard).
Just as important as the "content" is the shape of the pies. The skill of the hostess is often determined by whether she knows how to properly sculpt pies from one or another dough.
The best molds for yeast dough

From such a batch, pastries are soft and airy. What is the best way to make pies from yeast dough? In form, these products can take the form:
- ovals;
- circles;
- squares;
- triangles.
These are the figures that become voluminous thanks to the yeast dough and look especially advantageous.
How to sculpt oval pies from yeast dough?

The most popular form of yeast pies is oval. It is suitable for any filling.
- Divide the dough into small balls.
- Roll each ball into a roll.
- We cut the roll into small pieces-cubes (about 4 cm).
- We roll out the pieces into oval cakes up to 5 mm thick.
- We put the filling in the middle, throw one edge over the other, pinch in the form of a crescent.
- When frying or baking, put the pies on the seam.
How to make round pies from yeast dough?

Cute round pies remind of childhood. This form is especially well suited for fruit fillings, as it collects all the juice inside.
- We roll out small round cakes from the dough (about 5 mm).
- I put the stuffing in the center.
- Raise the edges of the cake and collect them in the middle.
- We fasten it thoroughly so that we get a bag.
- Lay out to bake with the clip down.
We make yeast pies with squares

Open pies-pillows look unusual. This form is suitable for dry fillings (potatoes, minced meat), as the juice of vegetable and fruit fillings will flow out.
- Roll out the dough into medium sized rectangles.
- Put the filling in the middle.
- Raise the corners and pinch together.
- Lay on a baking sheet or pan, seam side up.
How beautiful to mold triangular pies?

As a variety of pies with open fillings, triangular shapes cannot be ignored.
- We put the filling on a cake rolled out with a rectangle 0.5 cm thick.
- We fold the two edges so that we get an arrow.
- The two remaining edges are slightly tucked up.
The secrets of sculpting pies from yeast dough
To make the pies cute, it is worth considering a number of recommendations:
- pour a little sunflower oil on your hands - so the dough will not stick, and you can give it the desired shape;
- grease the edges of the cakes with water - then they will stick together well;
- before baking or frying pies, cover them for 15 minutes with cling film greased with vegetable (preferably corn) oil - they will become even more magnificent;
- Lubricate the tops of the pies with milk or a beaten egg - an appetizing crust forms on the pies.
The best forms for non-yeast dough
For housewives who do not like to mess with yeast, there are many test options without them. From the yeast-free “base”, pies are well obtained, the shape of which does not need additional volume:
- mugs;
- harnesses;
- with embossed lines.
At the same time, all variants of forms for yeast dough can also be used.
How to mold pies-mugs?
Experienced housewives know how beautifully to mold pies from non-yeast dough - to make mugs. This technology is very easy to master.
- From the rolled out dough, cut out circles of the same diameter.
- I put the stuffing in the center.
- Cover with another circle and pinch the edges.
- Put on a baking sheet or pan.
We make pies in the form of bundles

Those who like bigger pastries will surely like the pies-buns.
- Cut the rolled dough into several rectangles.
- Cut each rectangle along the edges into strips.
- Put the stuffing in the middle.
- We fold the strips crosswise, pinching the edges a little.
- Lay out on a cooking surface.
We sculpt embossed pies

If you want to surprise your loved ones with intricate pies, then take embossed forms into service.
- Cut out ovals from the rolled sheet.
- In the middle we put the stuffing in the form of sausages.
- We turn the top and bottom of the workpiece by a quarter.
- Now take the corners along the wide edge and fold them crosswise twice.
We seem to be "swaddling" our pies. It is beautiful, but only suitable for thick fillings.
Secrets of modeling pies from non-yeast dough
Pies made from this type of dough are very dense and, unlike yeast, can be lean. But in order for the pastries to turn out well, you need to know how to sculpt pies correctly if you work with a yeast-free base:
- to make the edges stick together better, grease them with egg white;
- if you want to get pastries with a delicate blush, grease them with brewed black tea before baking;
- if you are making oven pies, then start baking at 100 degrees and increase the temperature to the required gradually;
- To make oven pies soft and airy, after you take out the baking sheet, sprinkle the pastries with water.
It is difficult to agree with the opinion that only an experienced chef knows how to make pies. It’s not difficult at all - just follow 3 rules: make a fairly steep batch, avoid dough sticking and, most importantly, start baking only in a good mood. Then pies of any shape will be beautiful and tasty.
Related Articles